Welcome and setup guide
When you sign up as a new organizer, Scored sets up your organization and your first tournament with you. Then the setup guide takes you through the rest: your sport, formats, courts, teams, schedule and referees, one step at a time.
Each new tournament you create starts with the setup guide too. Tournaments you already have are unchanged.
The welcome screens
Section titled “The welcome screens”The first screen asks how you want to start.
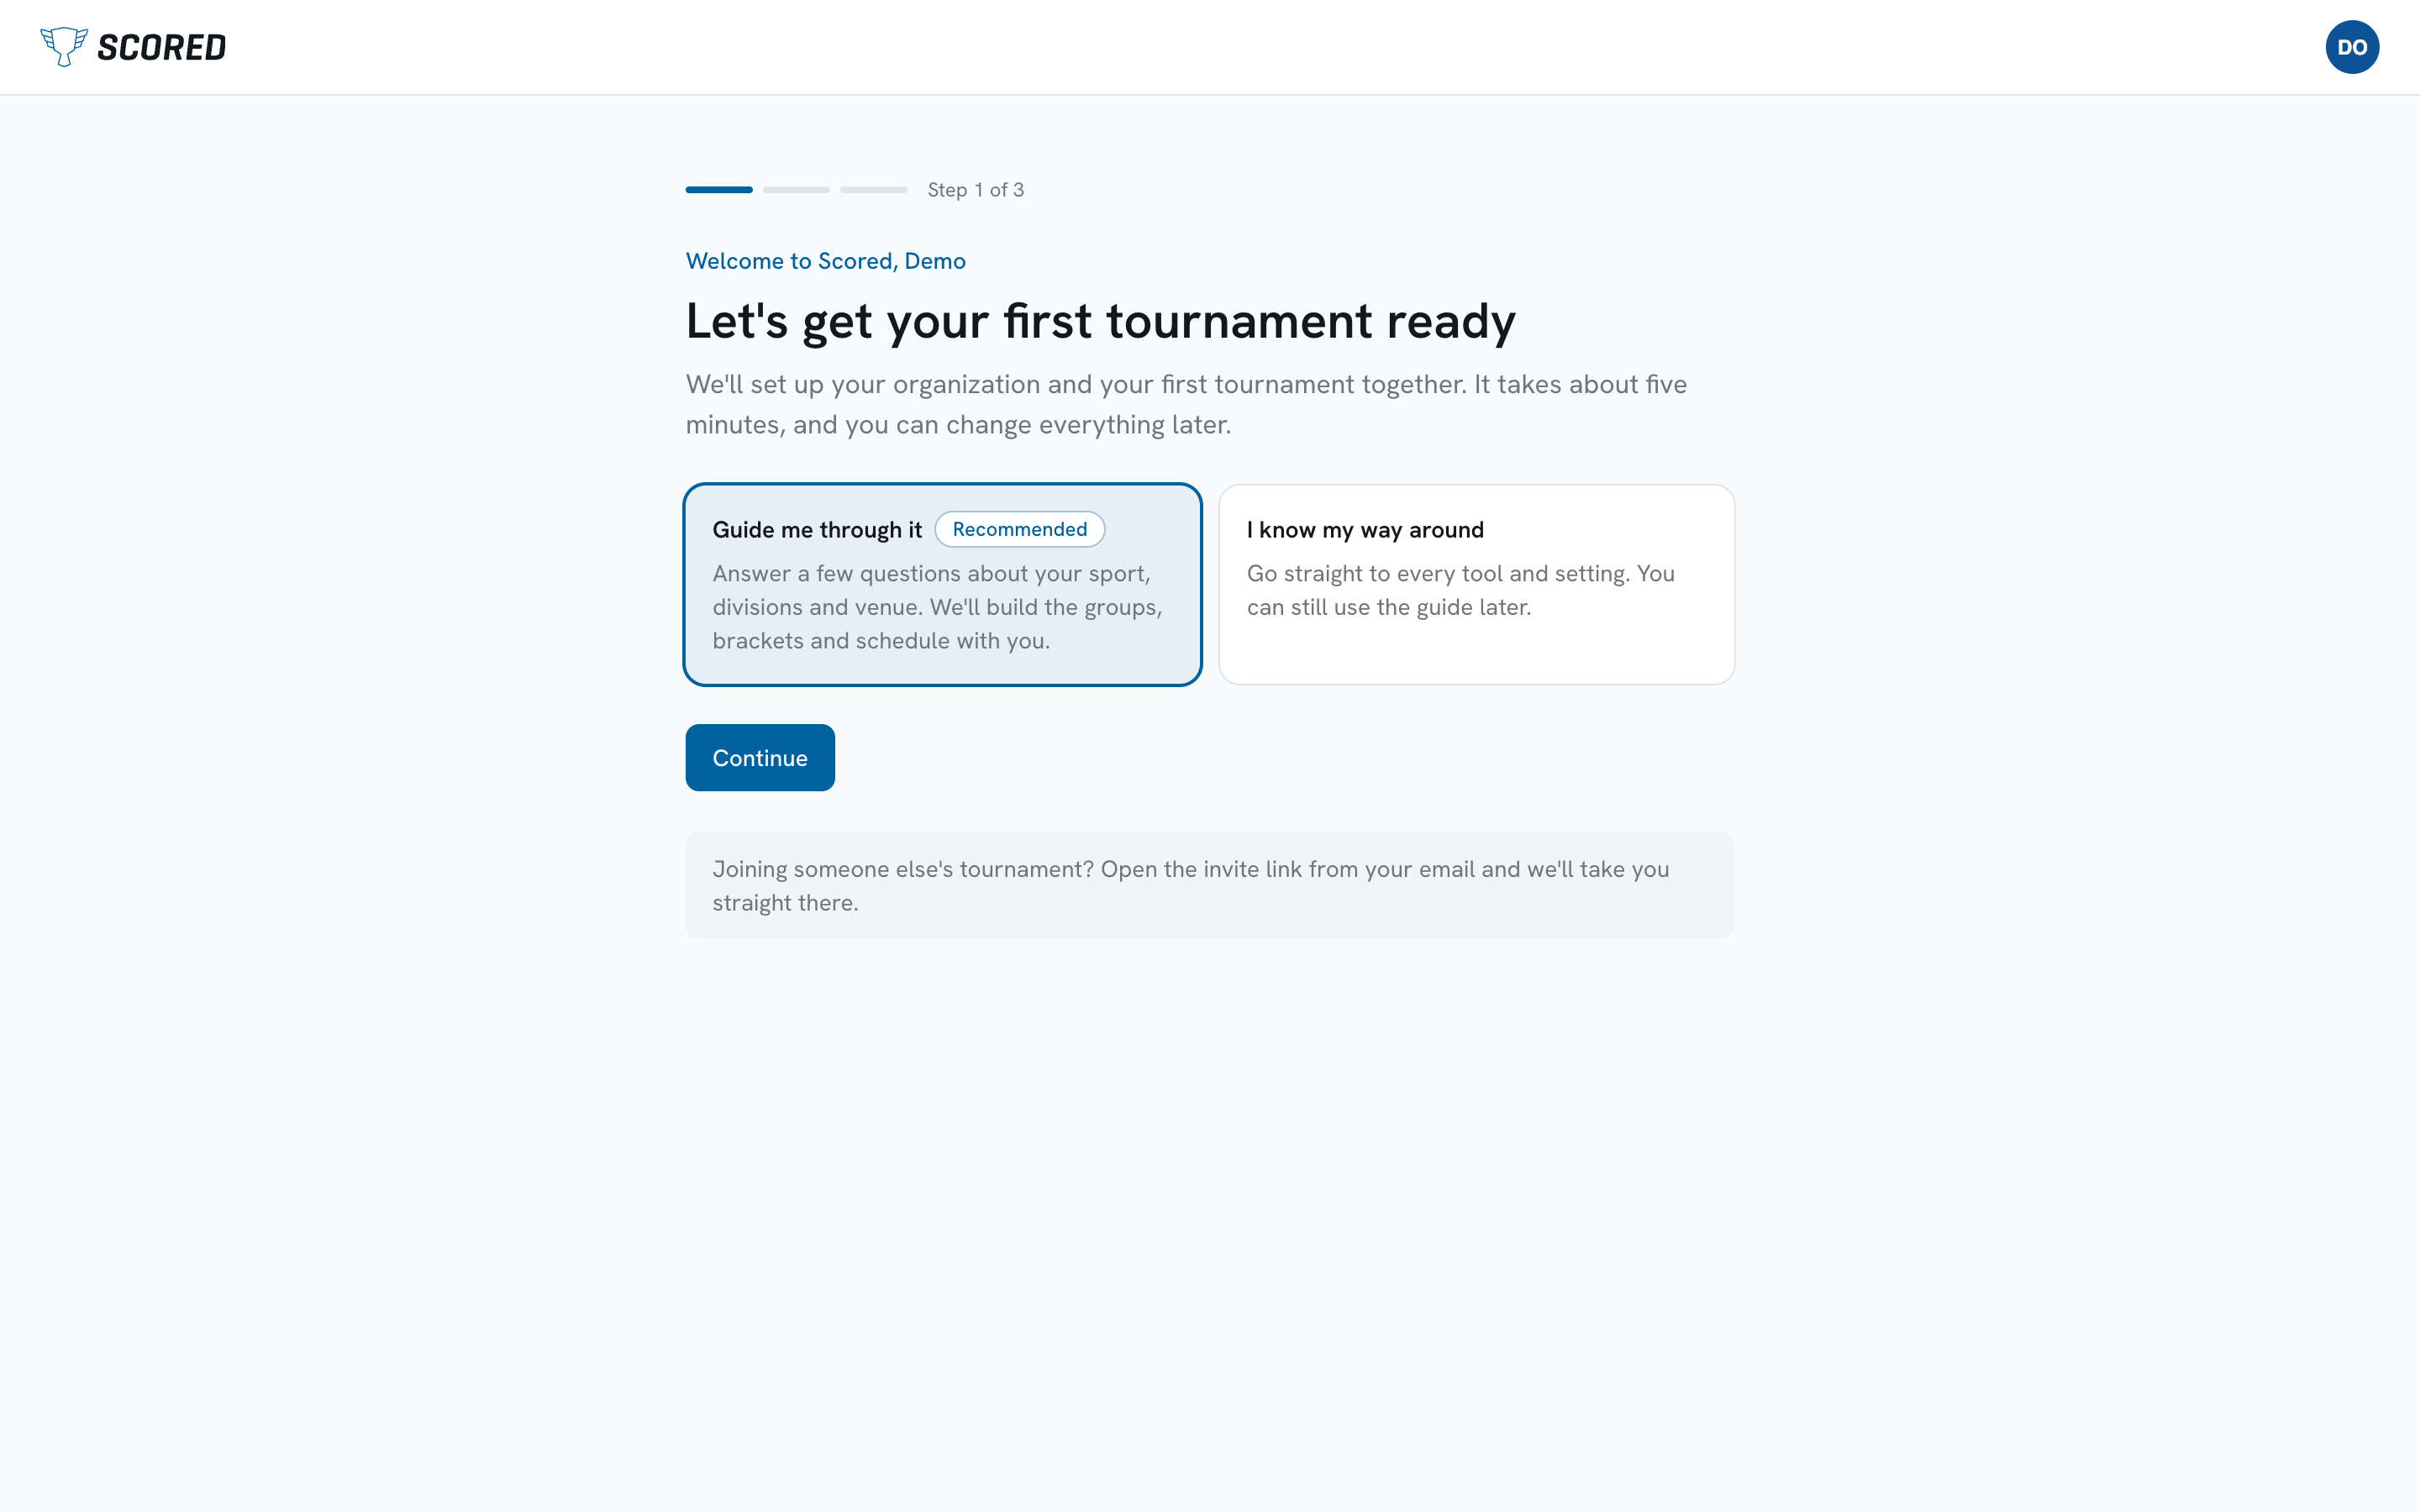
- Guide me through it - answer a few questions and build your tournament step by step. This is the one already selected.
- I know my way around - “Go straight to every tool and setting. You can still use the guide later.”
The next two screens ask for:
-
Your organization.
Its name, its web address, and a logo if you have one. Your organization has more on what an organization is for.
-
Your first tournament.
Its name and its first and last day. Scored fills in the time zone from your browser, so check it if the event is somewhere else. Your tournament starts on the Free plan, which holds up to 8 teams.
With Guide me through it, the setup guide opens next.
How the guide works
Section titled “How the guide works”The six steps are listed on the left, with what each one has set up so far. Your progress saves as you go. On a phone, tap Show steps to see the list.
| Step | Needed? |
|---|---|
| 1. Sport & divisions | Required |
| 2. Formats | Required |
| 3. Courts & times | Required |
| 4. Teams | Optional |
| 5. Schedule | Optional |
| 6. Referees | Optional |
The optional steps have a Skip for now button. You can open a skipped step again from the list on the left, or later from your tournament’s dashboard.
Step 1: Sport & divisions
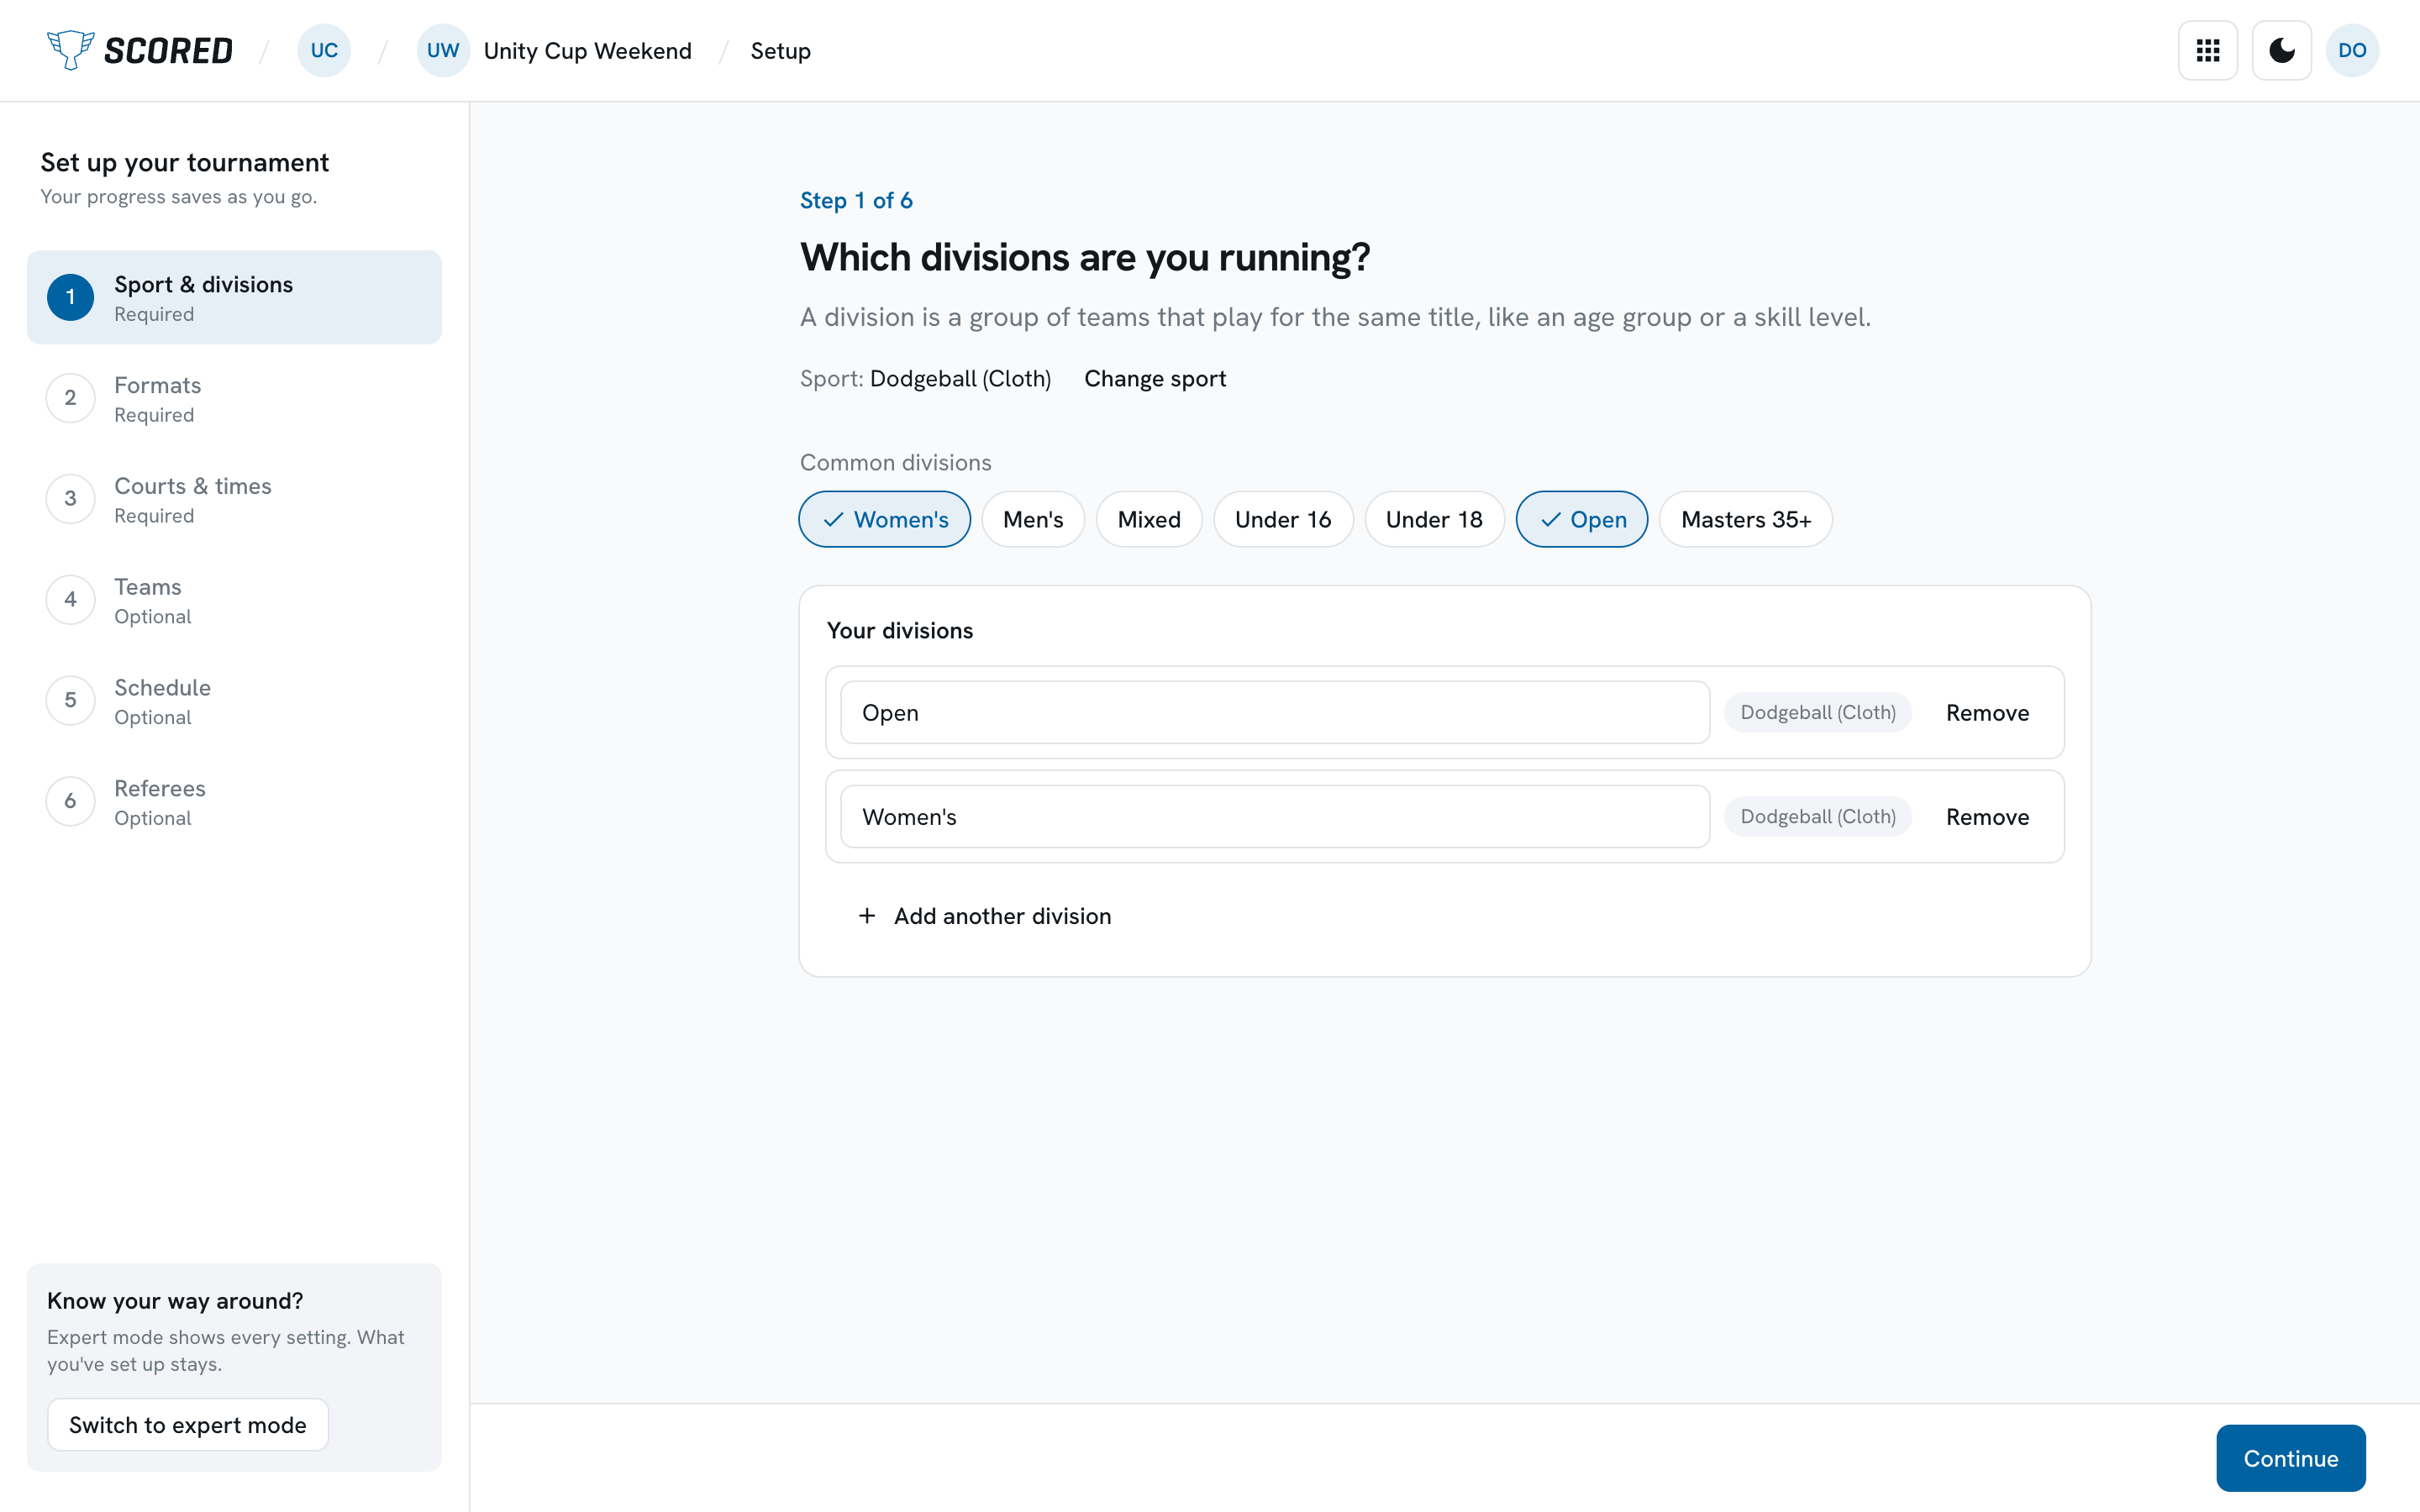
Section titled “Step 1: Sport & divisions”Pick the sport your tournament is for. Scored suggests up to three, and tells you why it suggests each one. If yours is not there, search for it under Can’t see yours?

Running more than one sport? Switch from One sport to Several sports.
Next, pick your divisions. A division is a group of teams that play for the same title, like an age group or a skill level. Pick any of the common ones - Women’s, Men’s, Mixed, Under 16, Under 18, Open, Masters 35+ - or click Add another division and type your own.
Step 2: Formats
Section titled “Step 2: Formats”Choose how your divisions play:
- Groups, then knockout (recommended) - teams play their group, then the best go into a knockout bracket.
- Groups only - everyone plays everyone in their group, and final places come from the standings.
- Knockout only - lose once and you’re out. Quick, but some teams only play one match.
Use the same format for every division is on to start with. Turn it off to pick a format per division.
Then enter roughly how many teams you expect in each division. As you change the number, Scored shows what that format becomes and how many matches it needs, with the total for the whole tournament underneath.
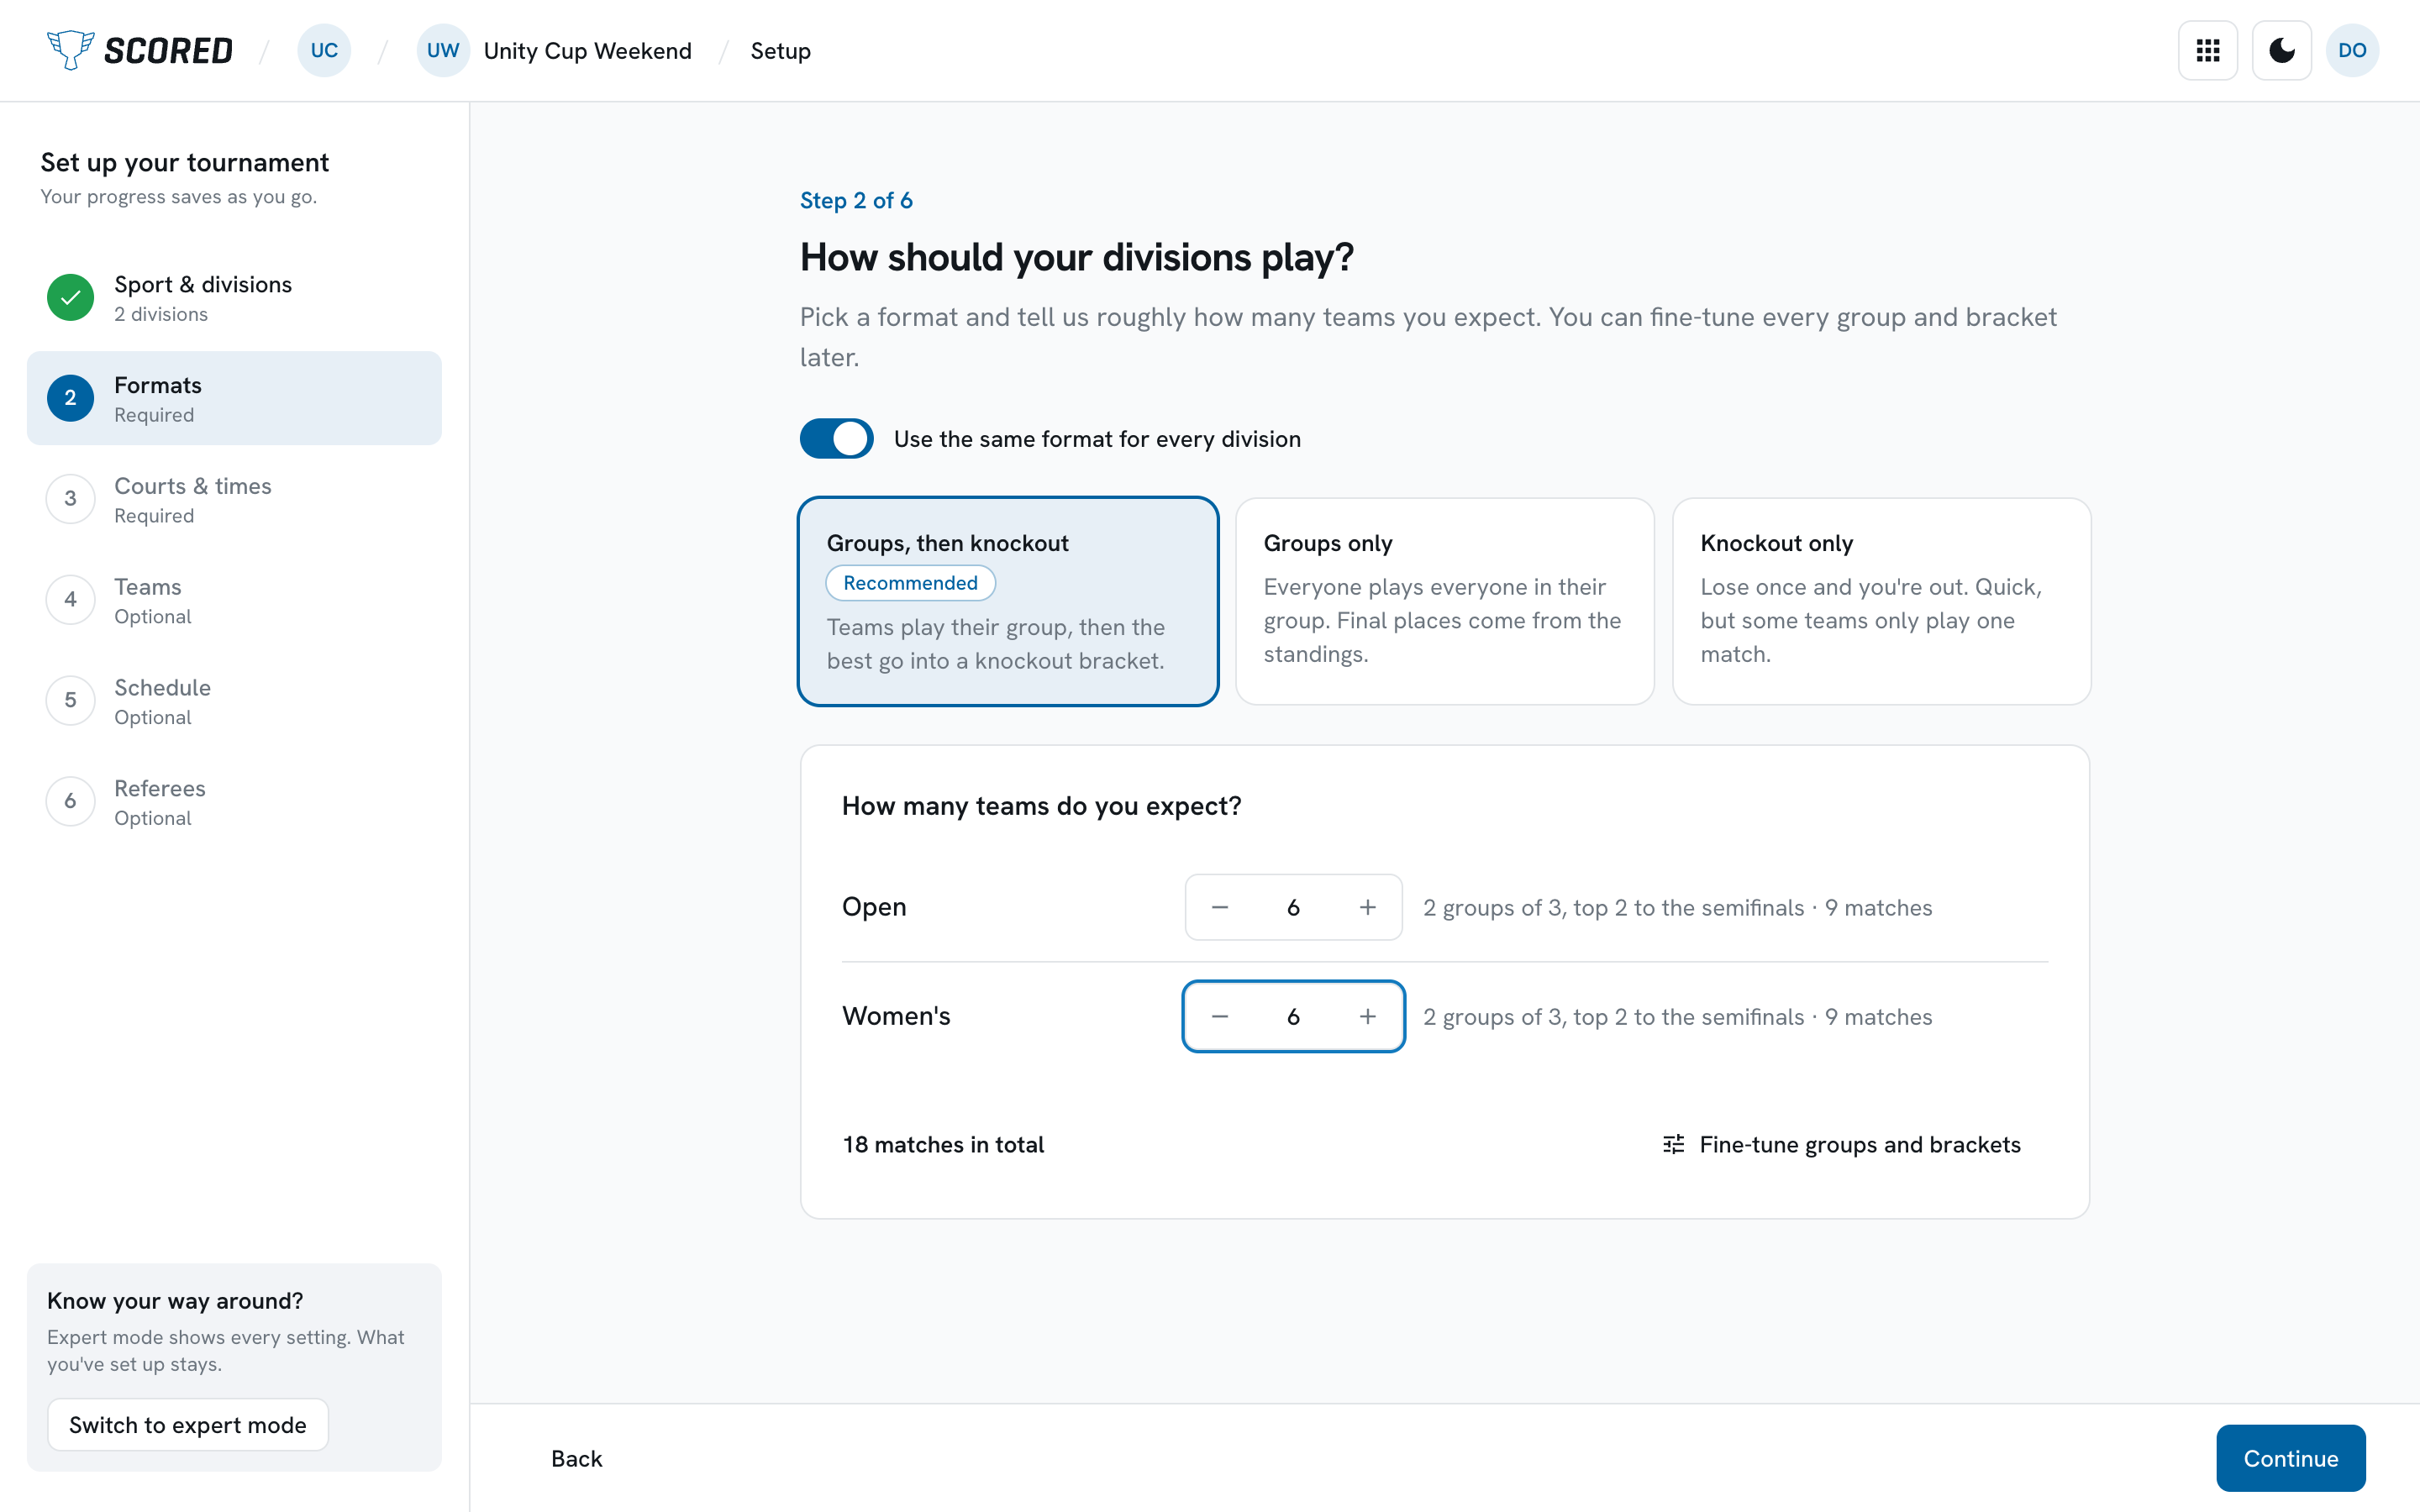
To change the groups and brackets in more detail, click Fine-tune groups and brackets. It opens the same wizard as the Structure page.
Step 3: Courts & times
Section titled “Step 3: Courts & times”-
Enter how many courts you have.
They are called Court 1, Court 2 and so on. Click Rename courts to use your own names.
-
Set the opening hours for each day.
There is one card for each day of your tournament, set to 9:00 to 18:00 to start with.
-
Set the match length.
The same length on each day, in minutes. Include the time teams need to change over.
At the bottom, Scored checks whether your matches fit, for example “Room for 54 matches” when your formats need 18. If they do not fit, it tells you what to add, such as another court or a later closing time. You can continue either way and change this later.
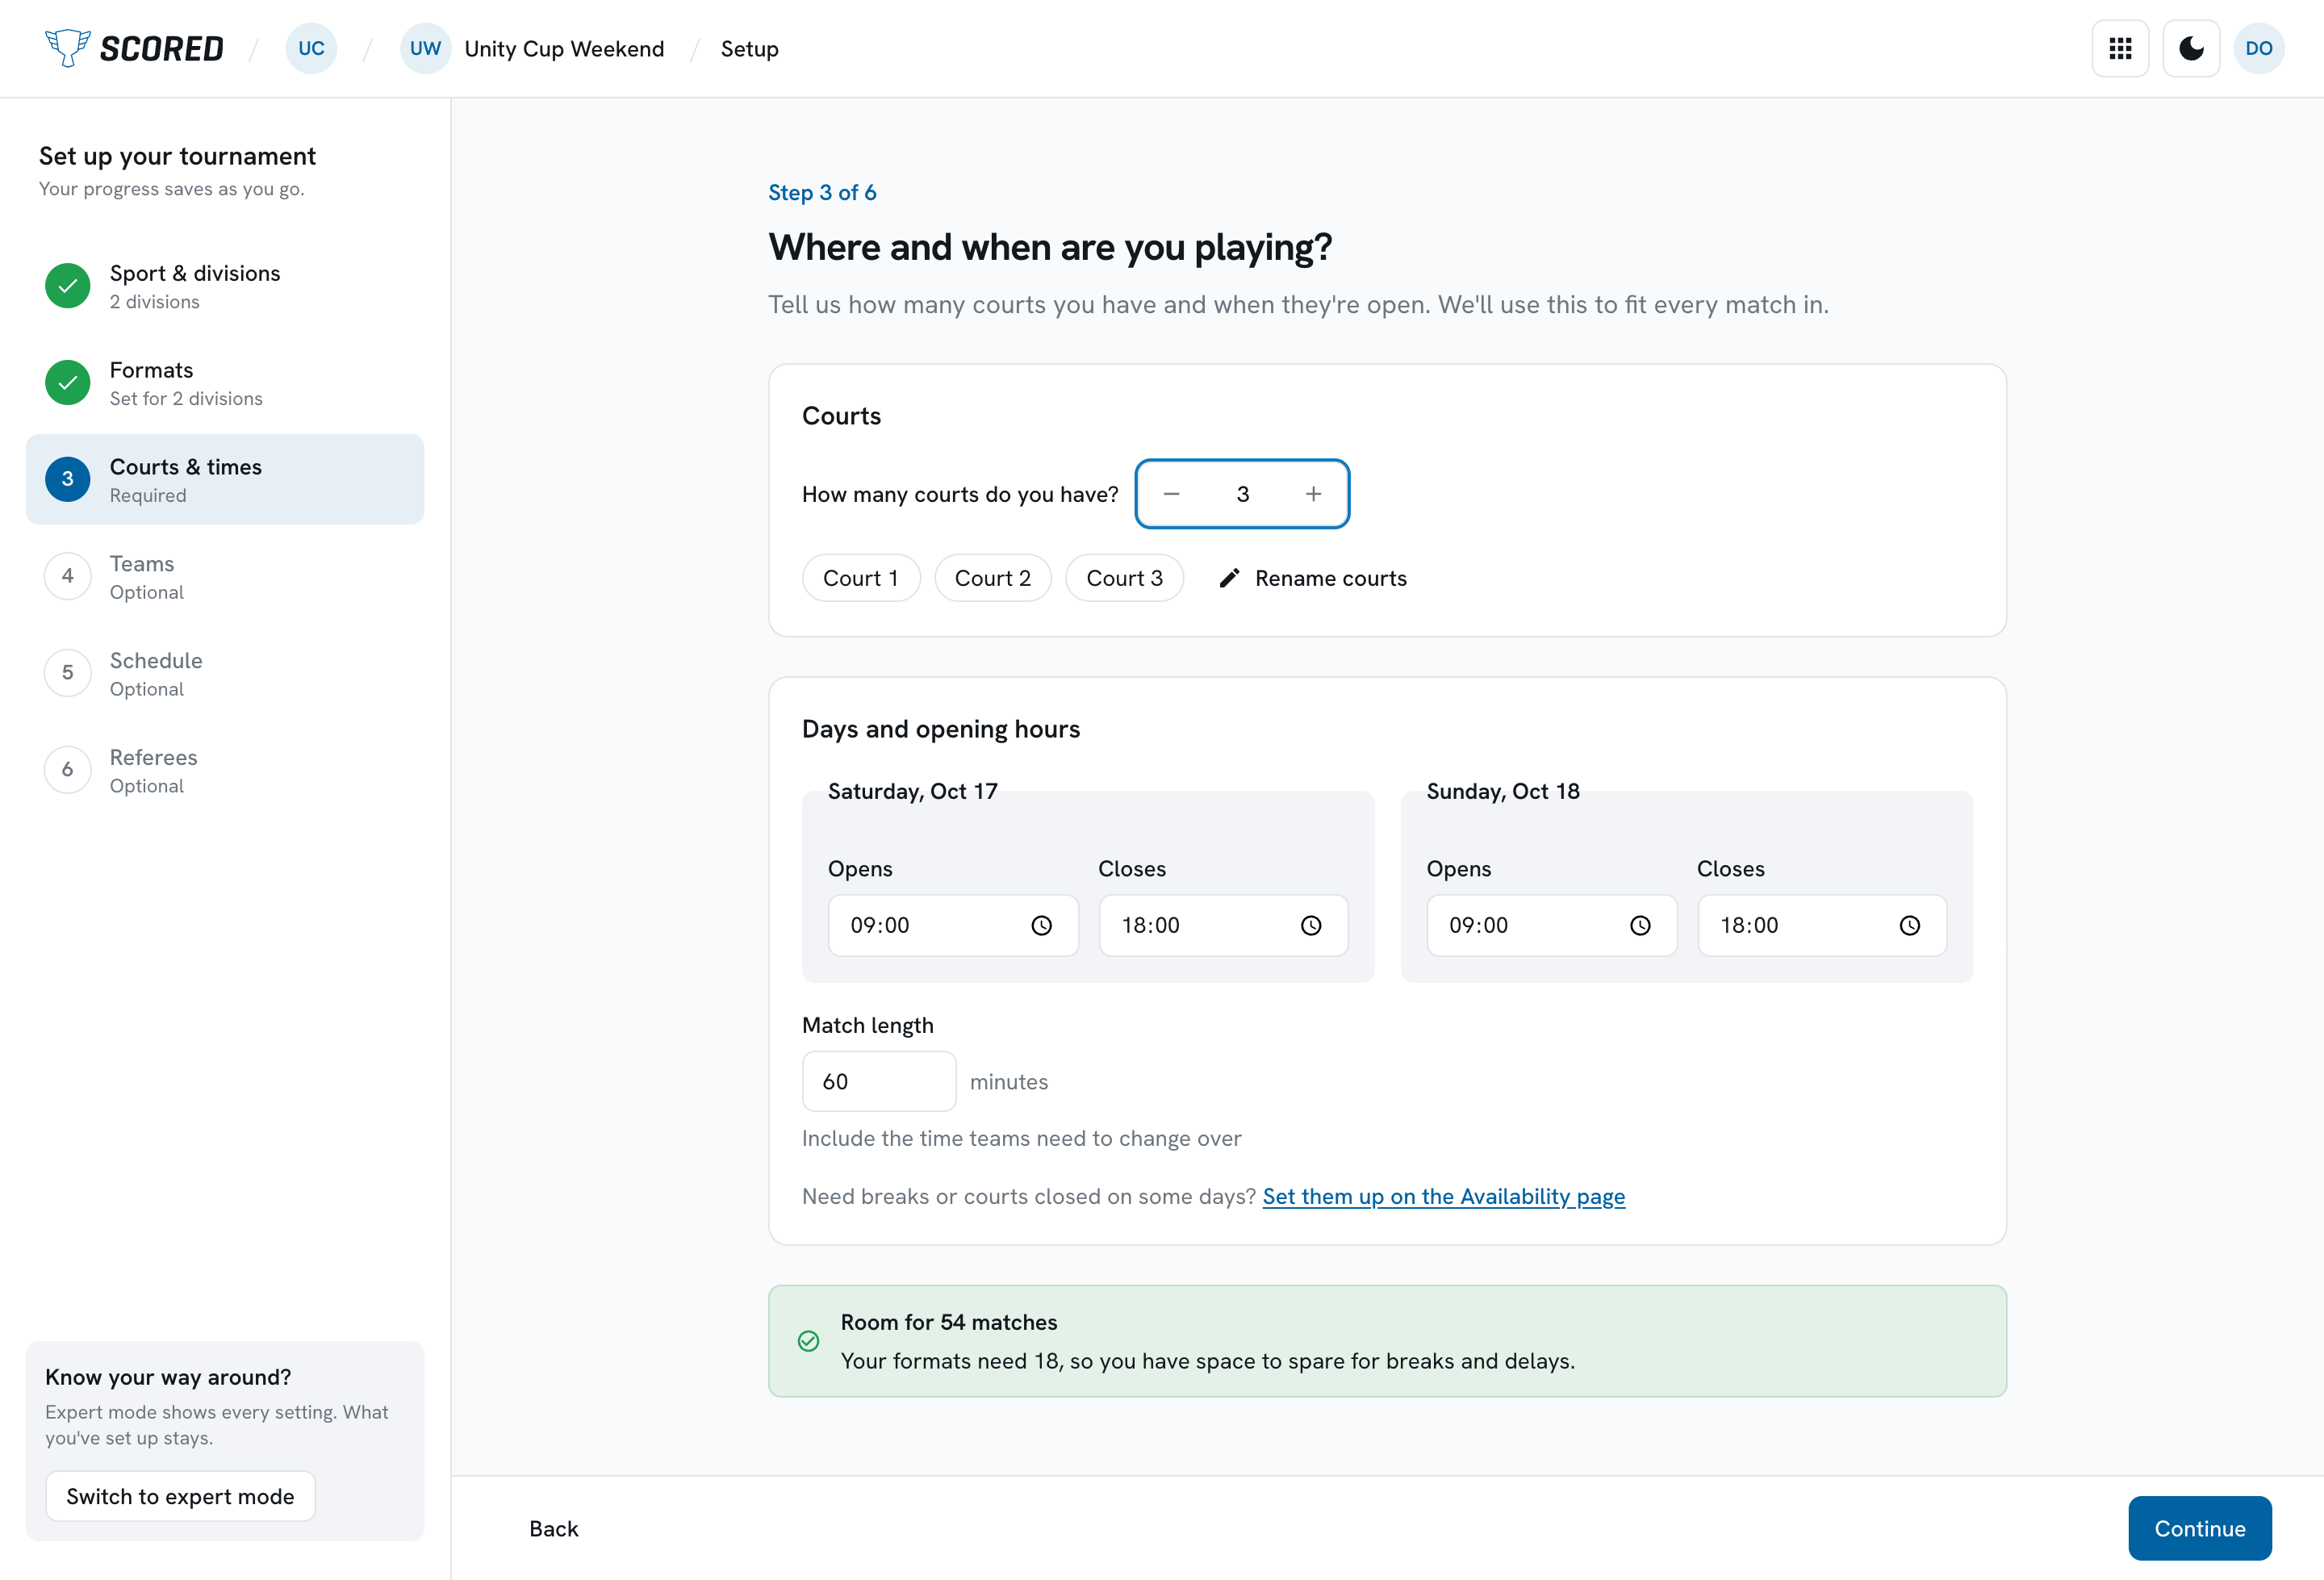
Breaks, and courts that are closed on some days, are set on the Availability page instead - see Schedule.
Step 4: Teams
Section titled “Step 4: Teams”You can skip this step and add teams later from the Teams page.
There are two ways to add them:
- Type them in - type or paste team names, one per line, in each division’s box. Each box counts your teams against the number you planned in Formats. Scored leaves out repeated names and empty lines, and tells you when it does. Click Add N teams when you are done.
- Import a spreadsheet - the same import as on the Teams page, see Import your teams and players.
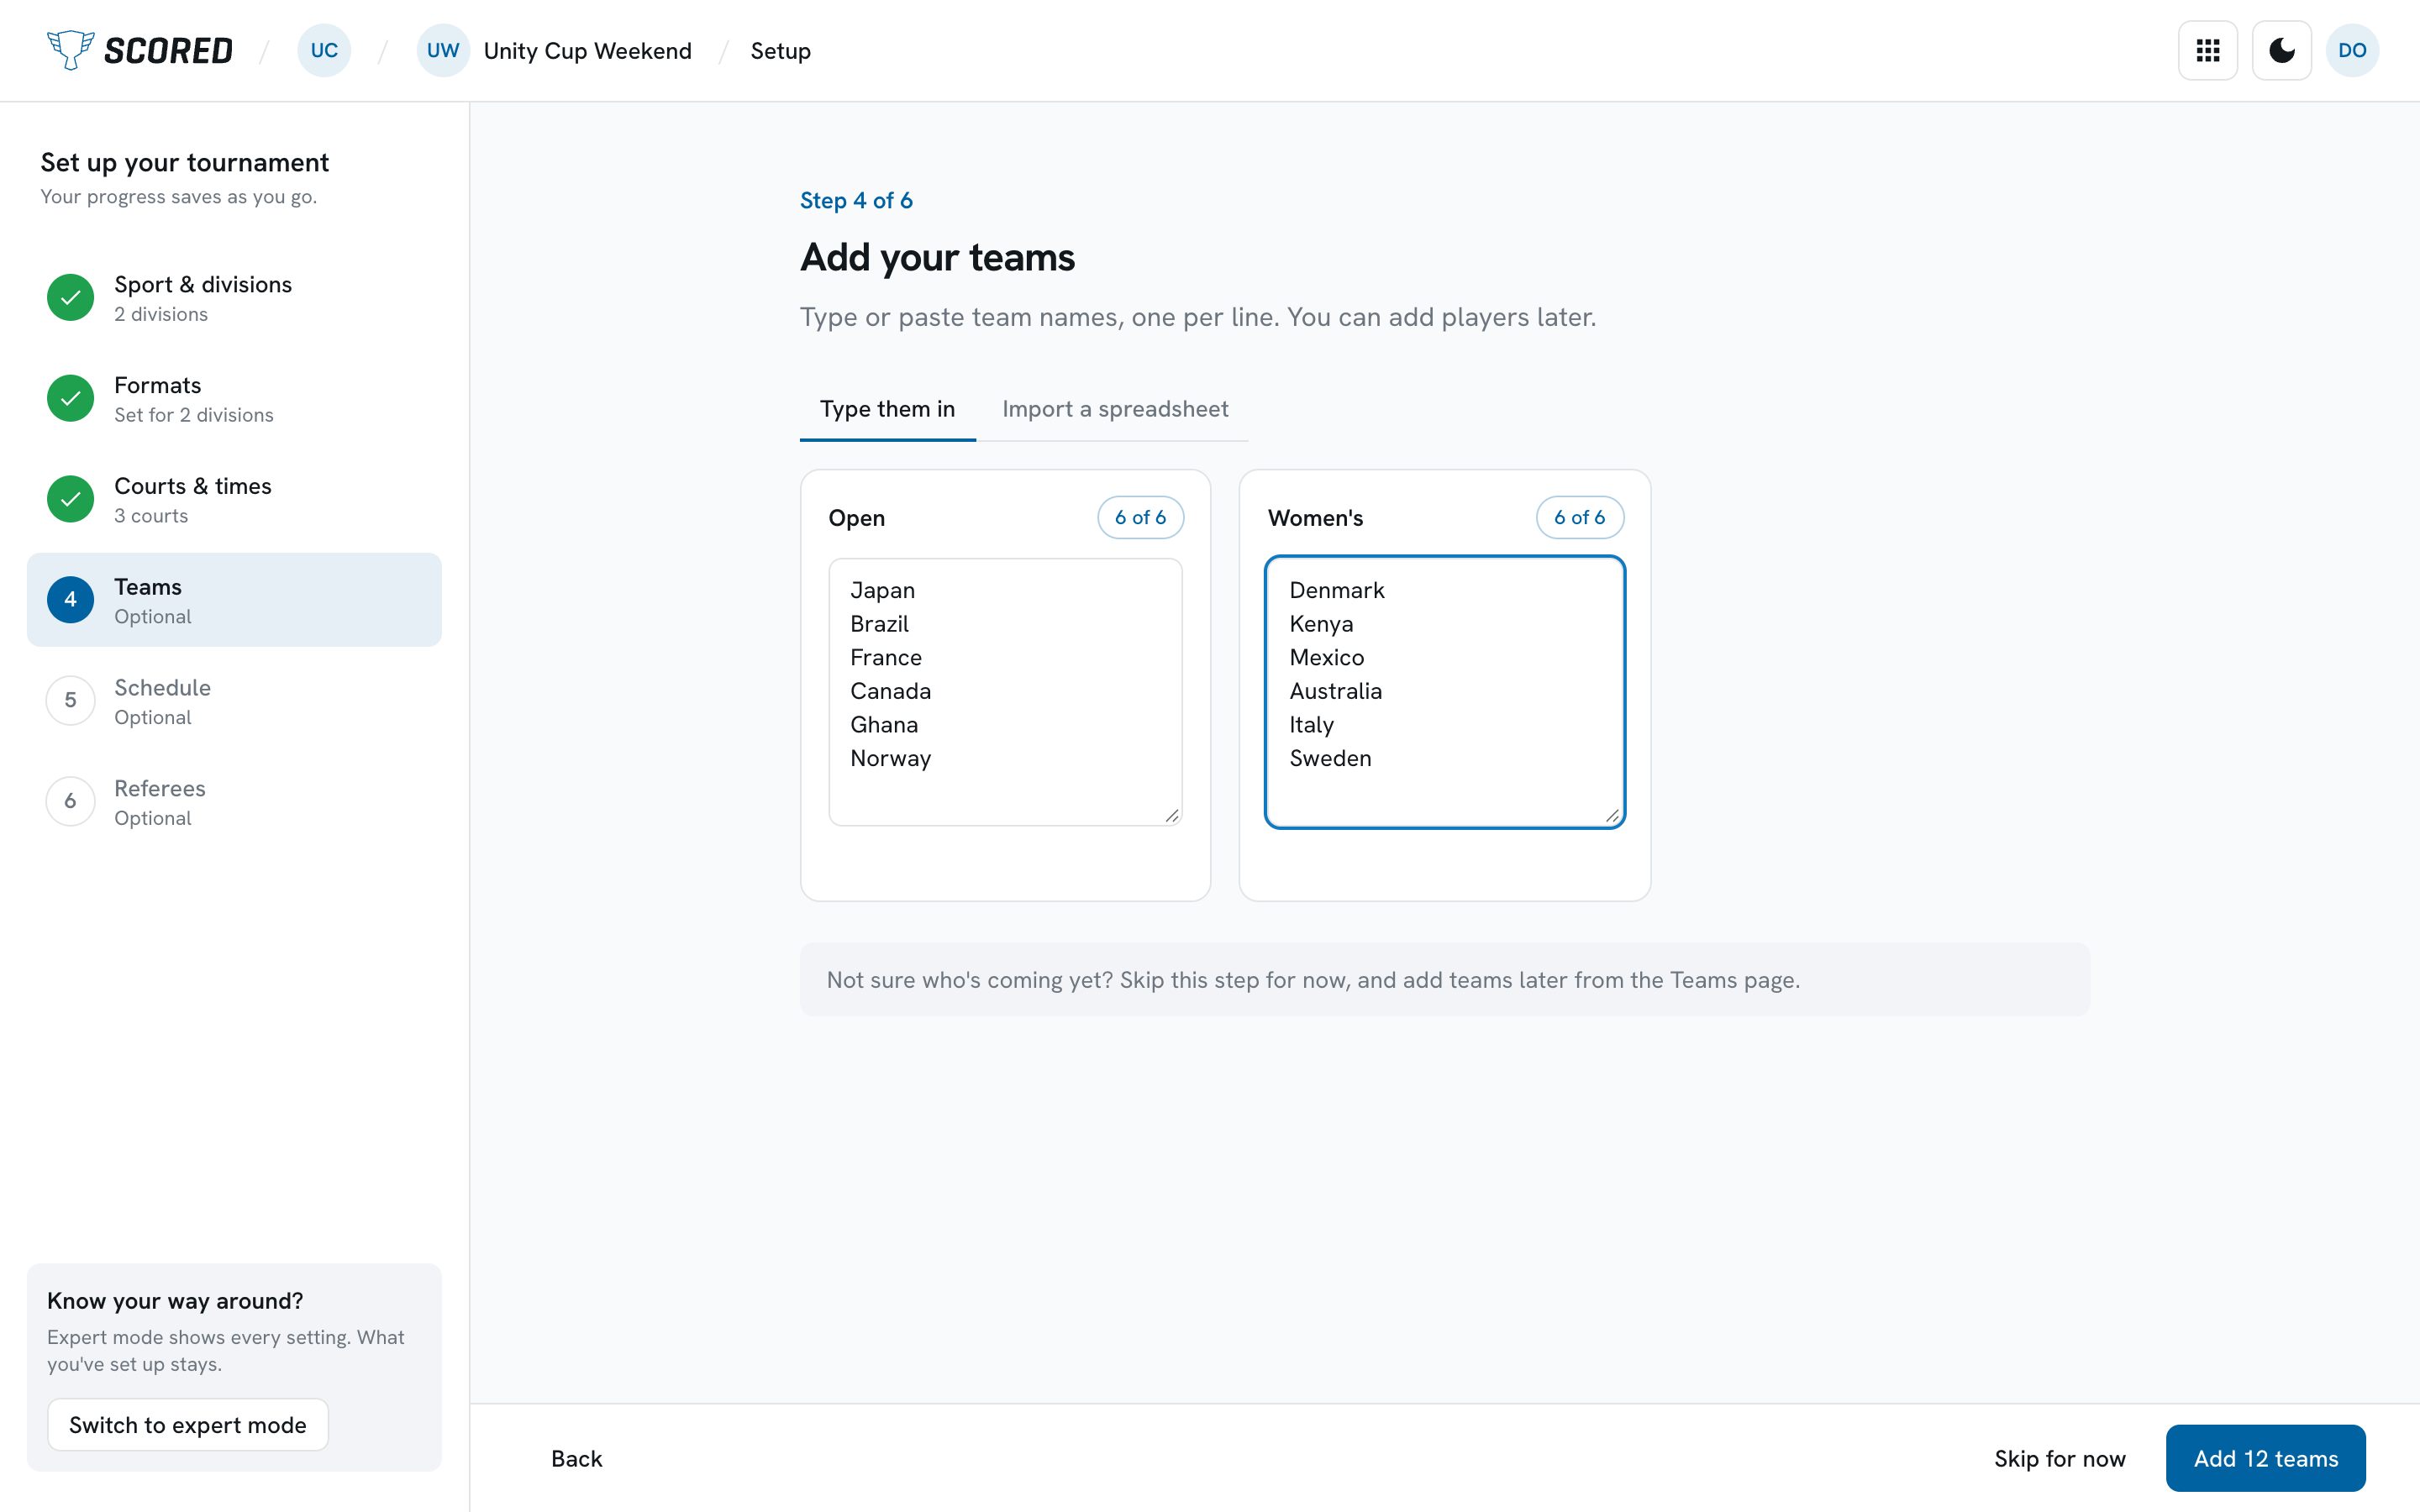
Your plan’s team limit applies here as everywhere else: 8 teams on Free, 32 on Small, 64 on Medium, and no limit on Large.
Step 5: Schedule
Section titled “Step 5: Schedule”You can skip this step and schedule later on the Schedule page.
-
Choose how divisions share the courts.
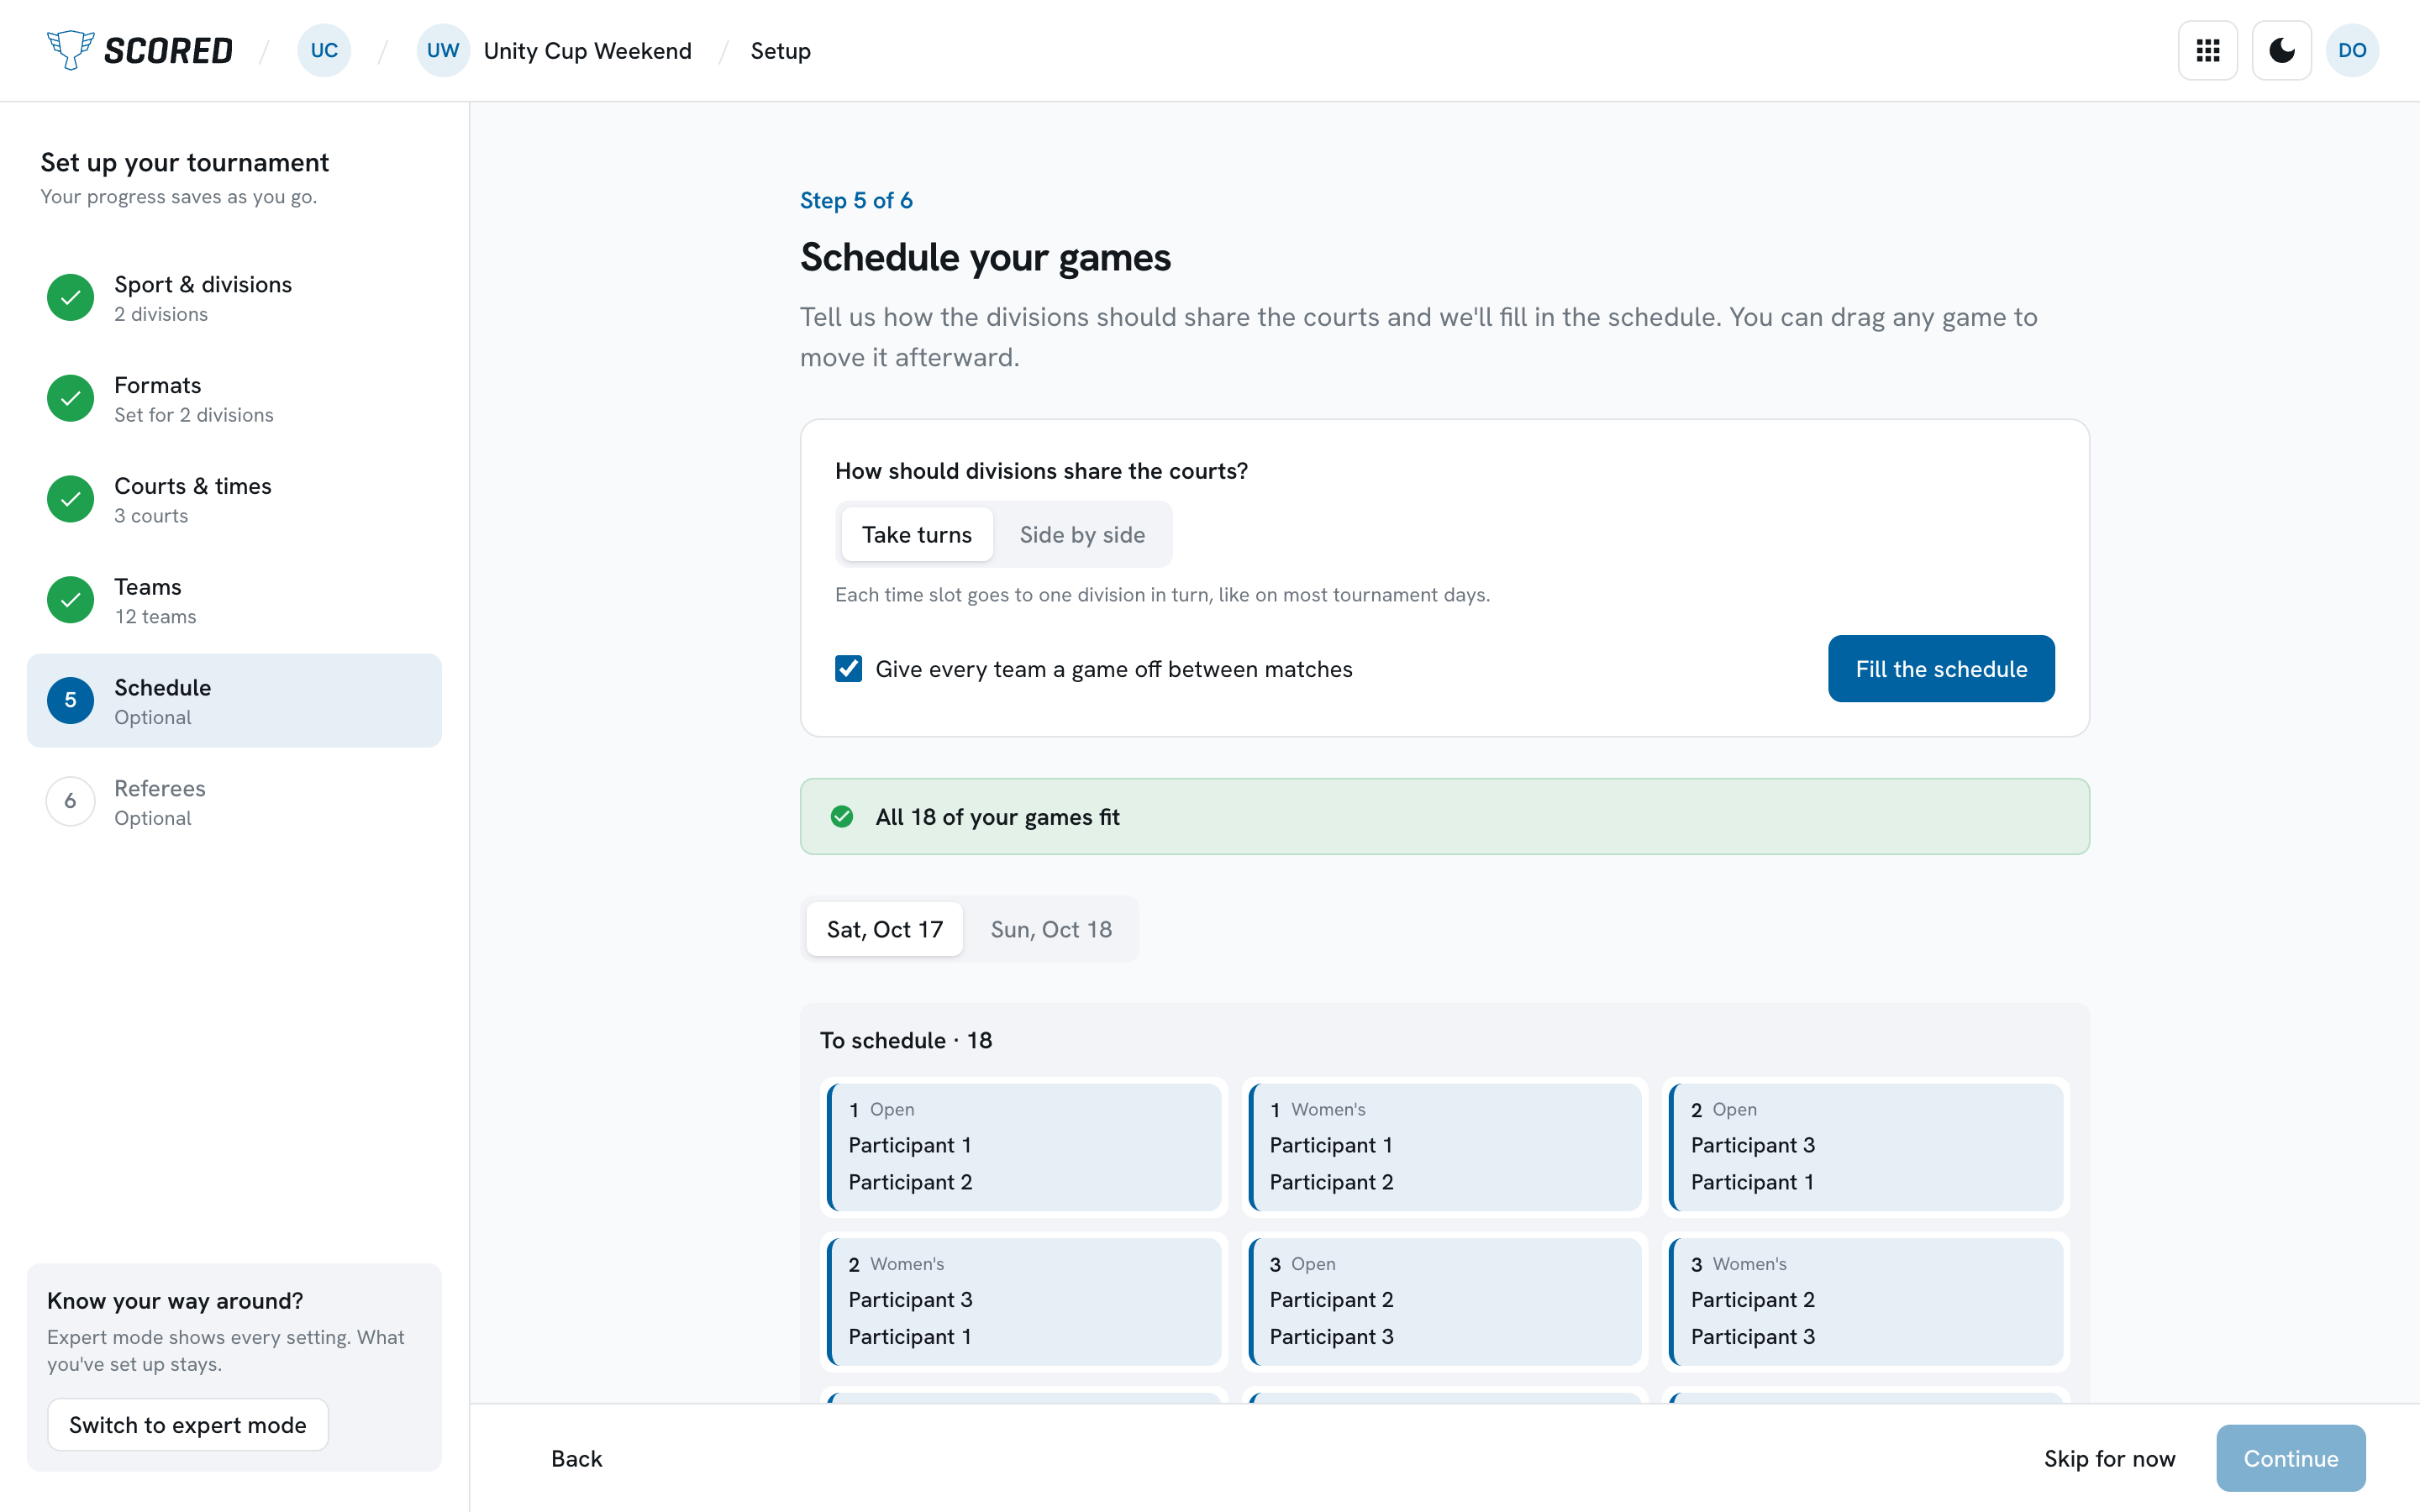
Take turns gives each time slot to one division in turn, like on most tournament days. Side by side has divisions play at the same time, sharing out the courts.
-
Choose whether teams get a rest.
Give every team a game off between matches is ticked to start with.
-
Check what fits.
Scored tells you how many of your games fit, for example “All 18 of your games fit”. If some do not, it says why.
-
Click Fill the schedule.
Scored puts your games on courts and times.
The filled schedule is a grid with a tab for each day and a column for each court. To change it:
- Drag a game to move it to another court or time.
- Drop it on another game to swap the two.
Scored marks anything that looks off in amber on the game, such as “Back to back”. If a move clashes with another game, you see “This spot has a conflict.” and can still click Place anyway - the call is yours.
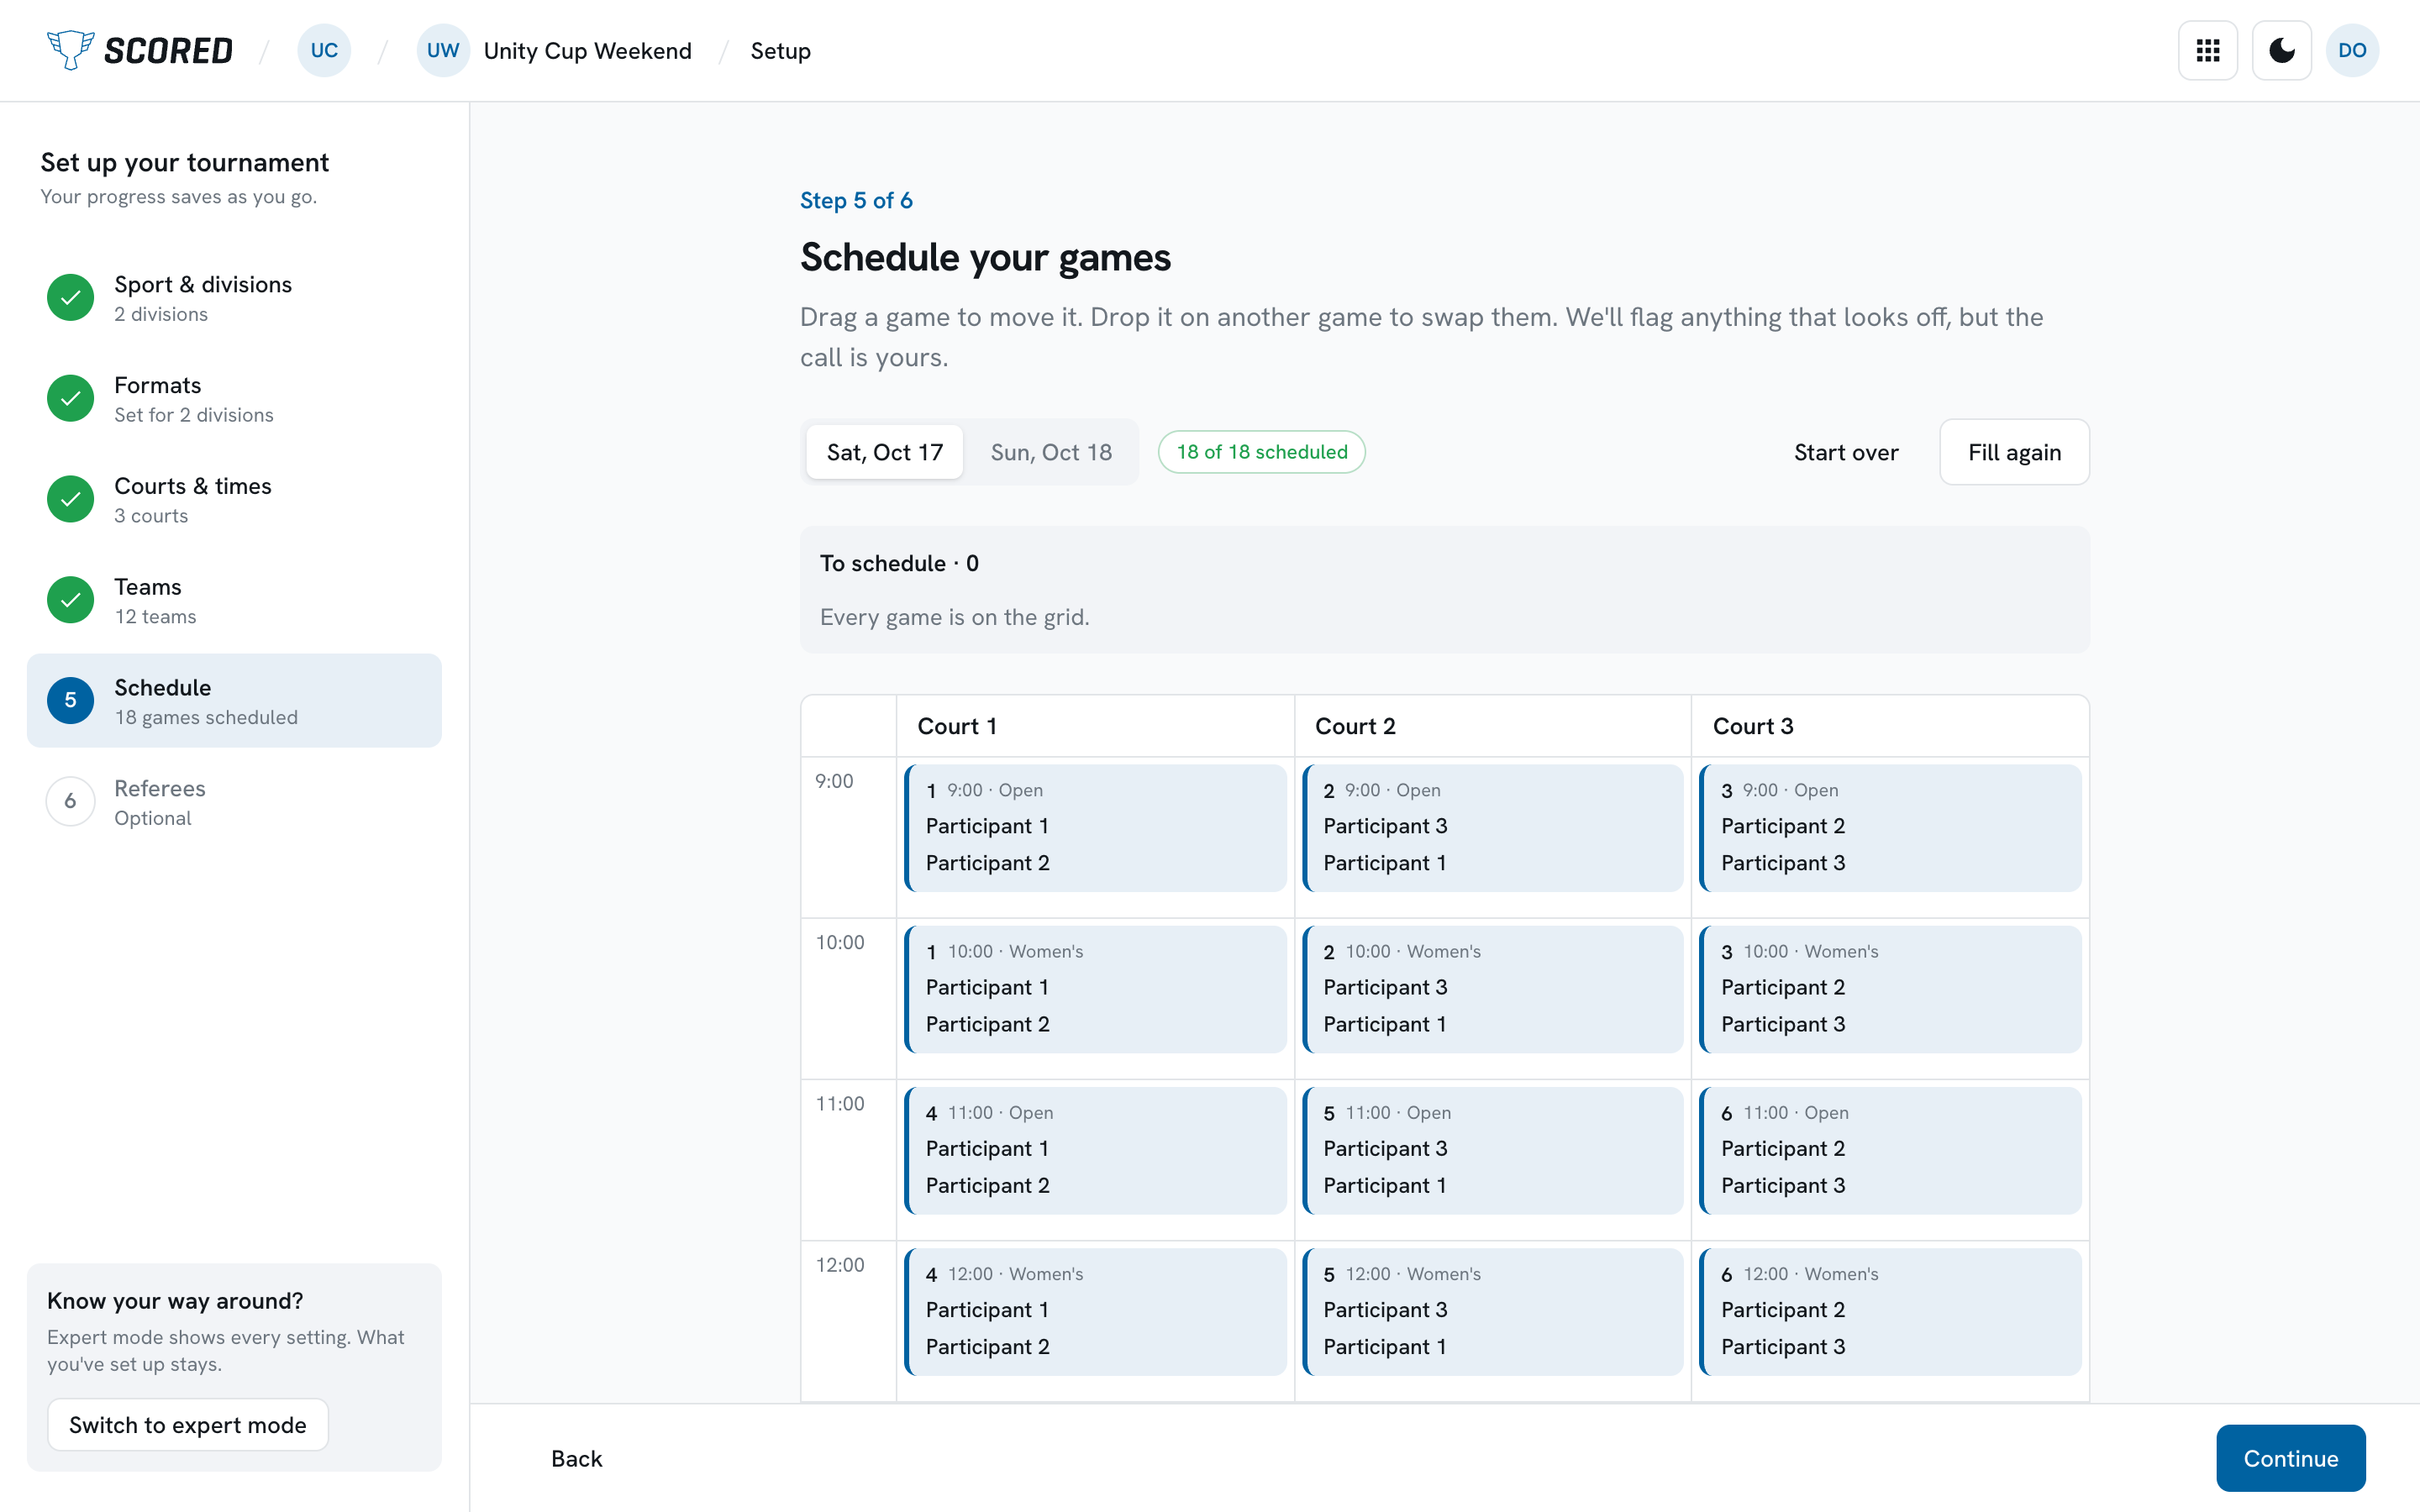
Any game that did not fit waits in the To schedule list above the grid, with the reason and what to add. Drag it onto the grid, or add time or a court in step 3.
- Fill again fills around the games you have already placed.
- Start over takes the games off the grid, so you can fill it again. It asks you first.
This step places games only, not referees.
Step 6: Referees
Section titled “Step 6: Referees”You can skip this step and invite referees later.
Inviting referees comes with the Small plan and up. On Free, this step tells you your plan doesn’t include referees yet: skip it for now, or upgrade the tournament to Small to invite them - see Plans & billing.
On Small and up:
-
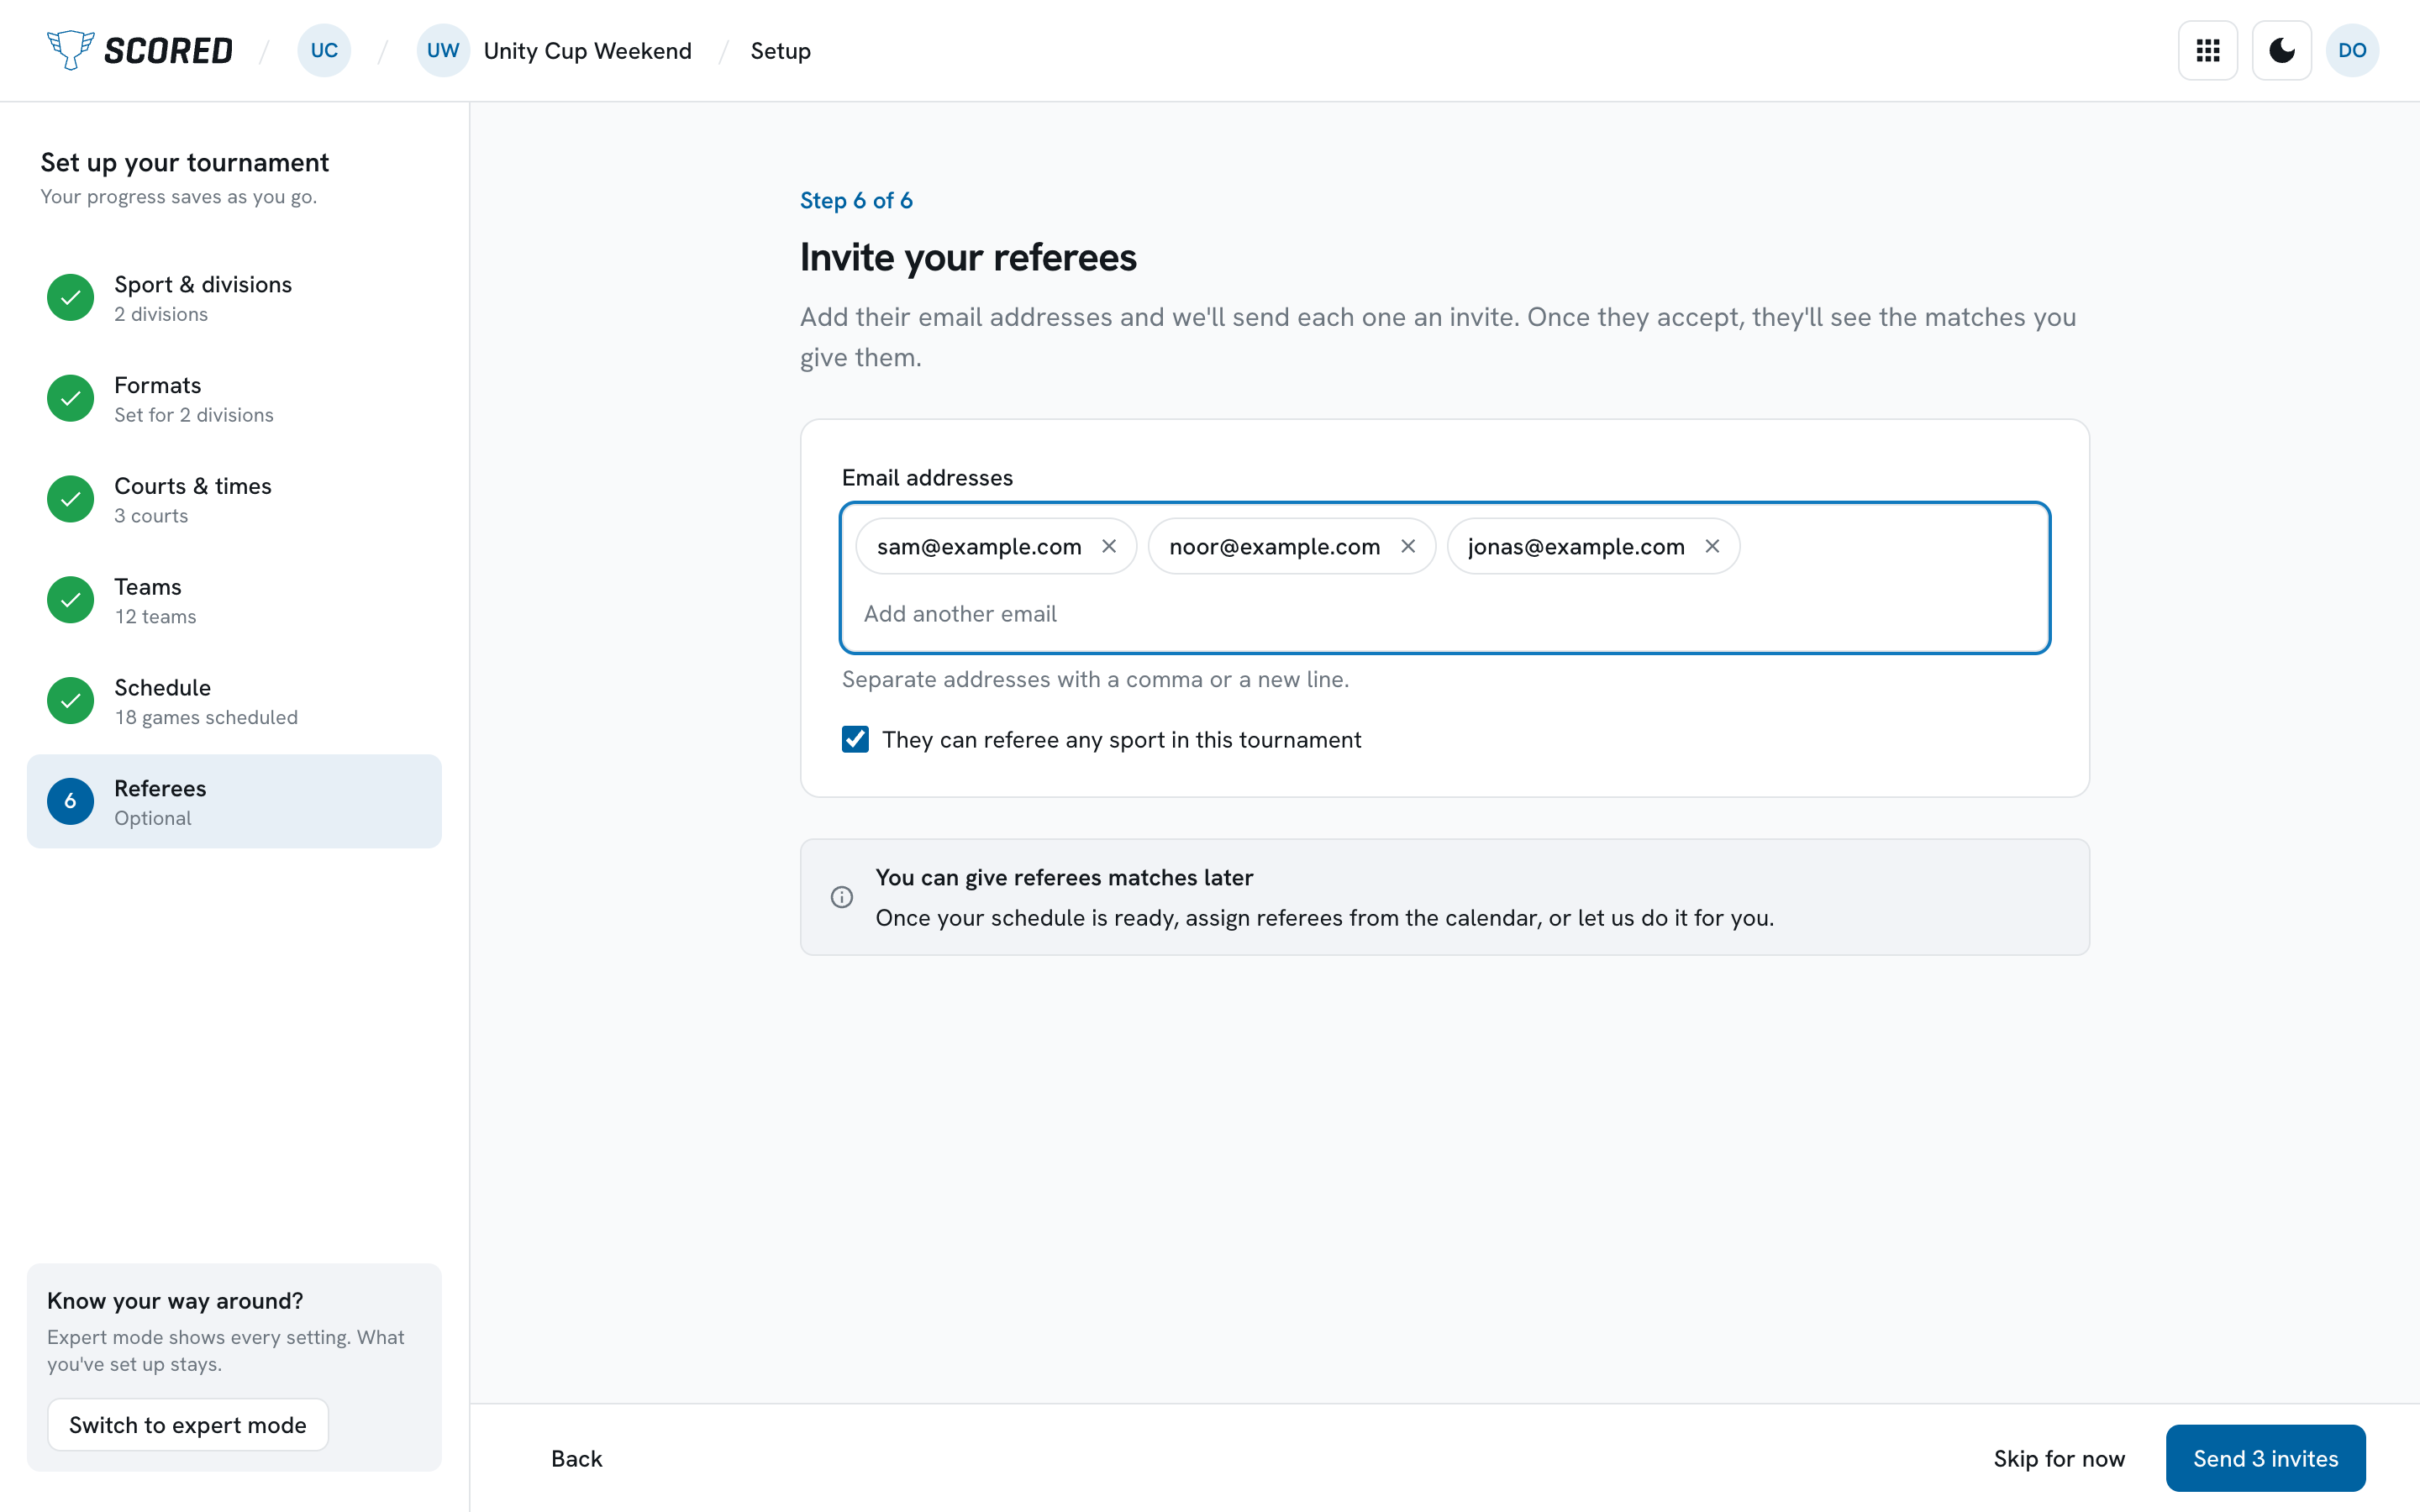
Add their email addresses.
Separate them with a comma or a new line.
-
Leave “They can referee any sport in this tournament” ticked, or untick it.
-
Click Send N invites.
Each person gets one invite. Once they accept, they see the matches you give them.
You give referees their matches once your schedule is ready, on the Schedule page.
Ready to go
Section titled “Ready to go”After the last step, Scored shows everything you set up, with a count for each step. Skipped steps have a button to go back to them.
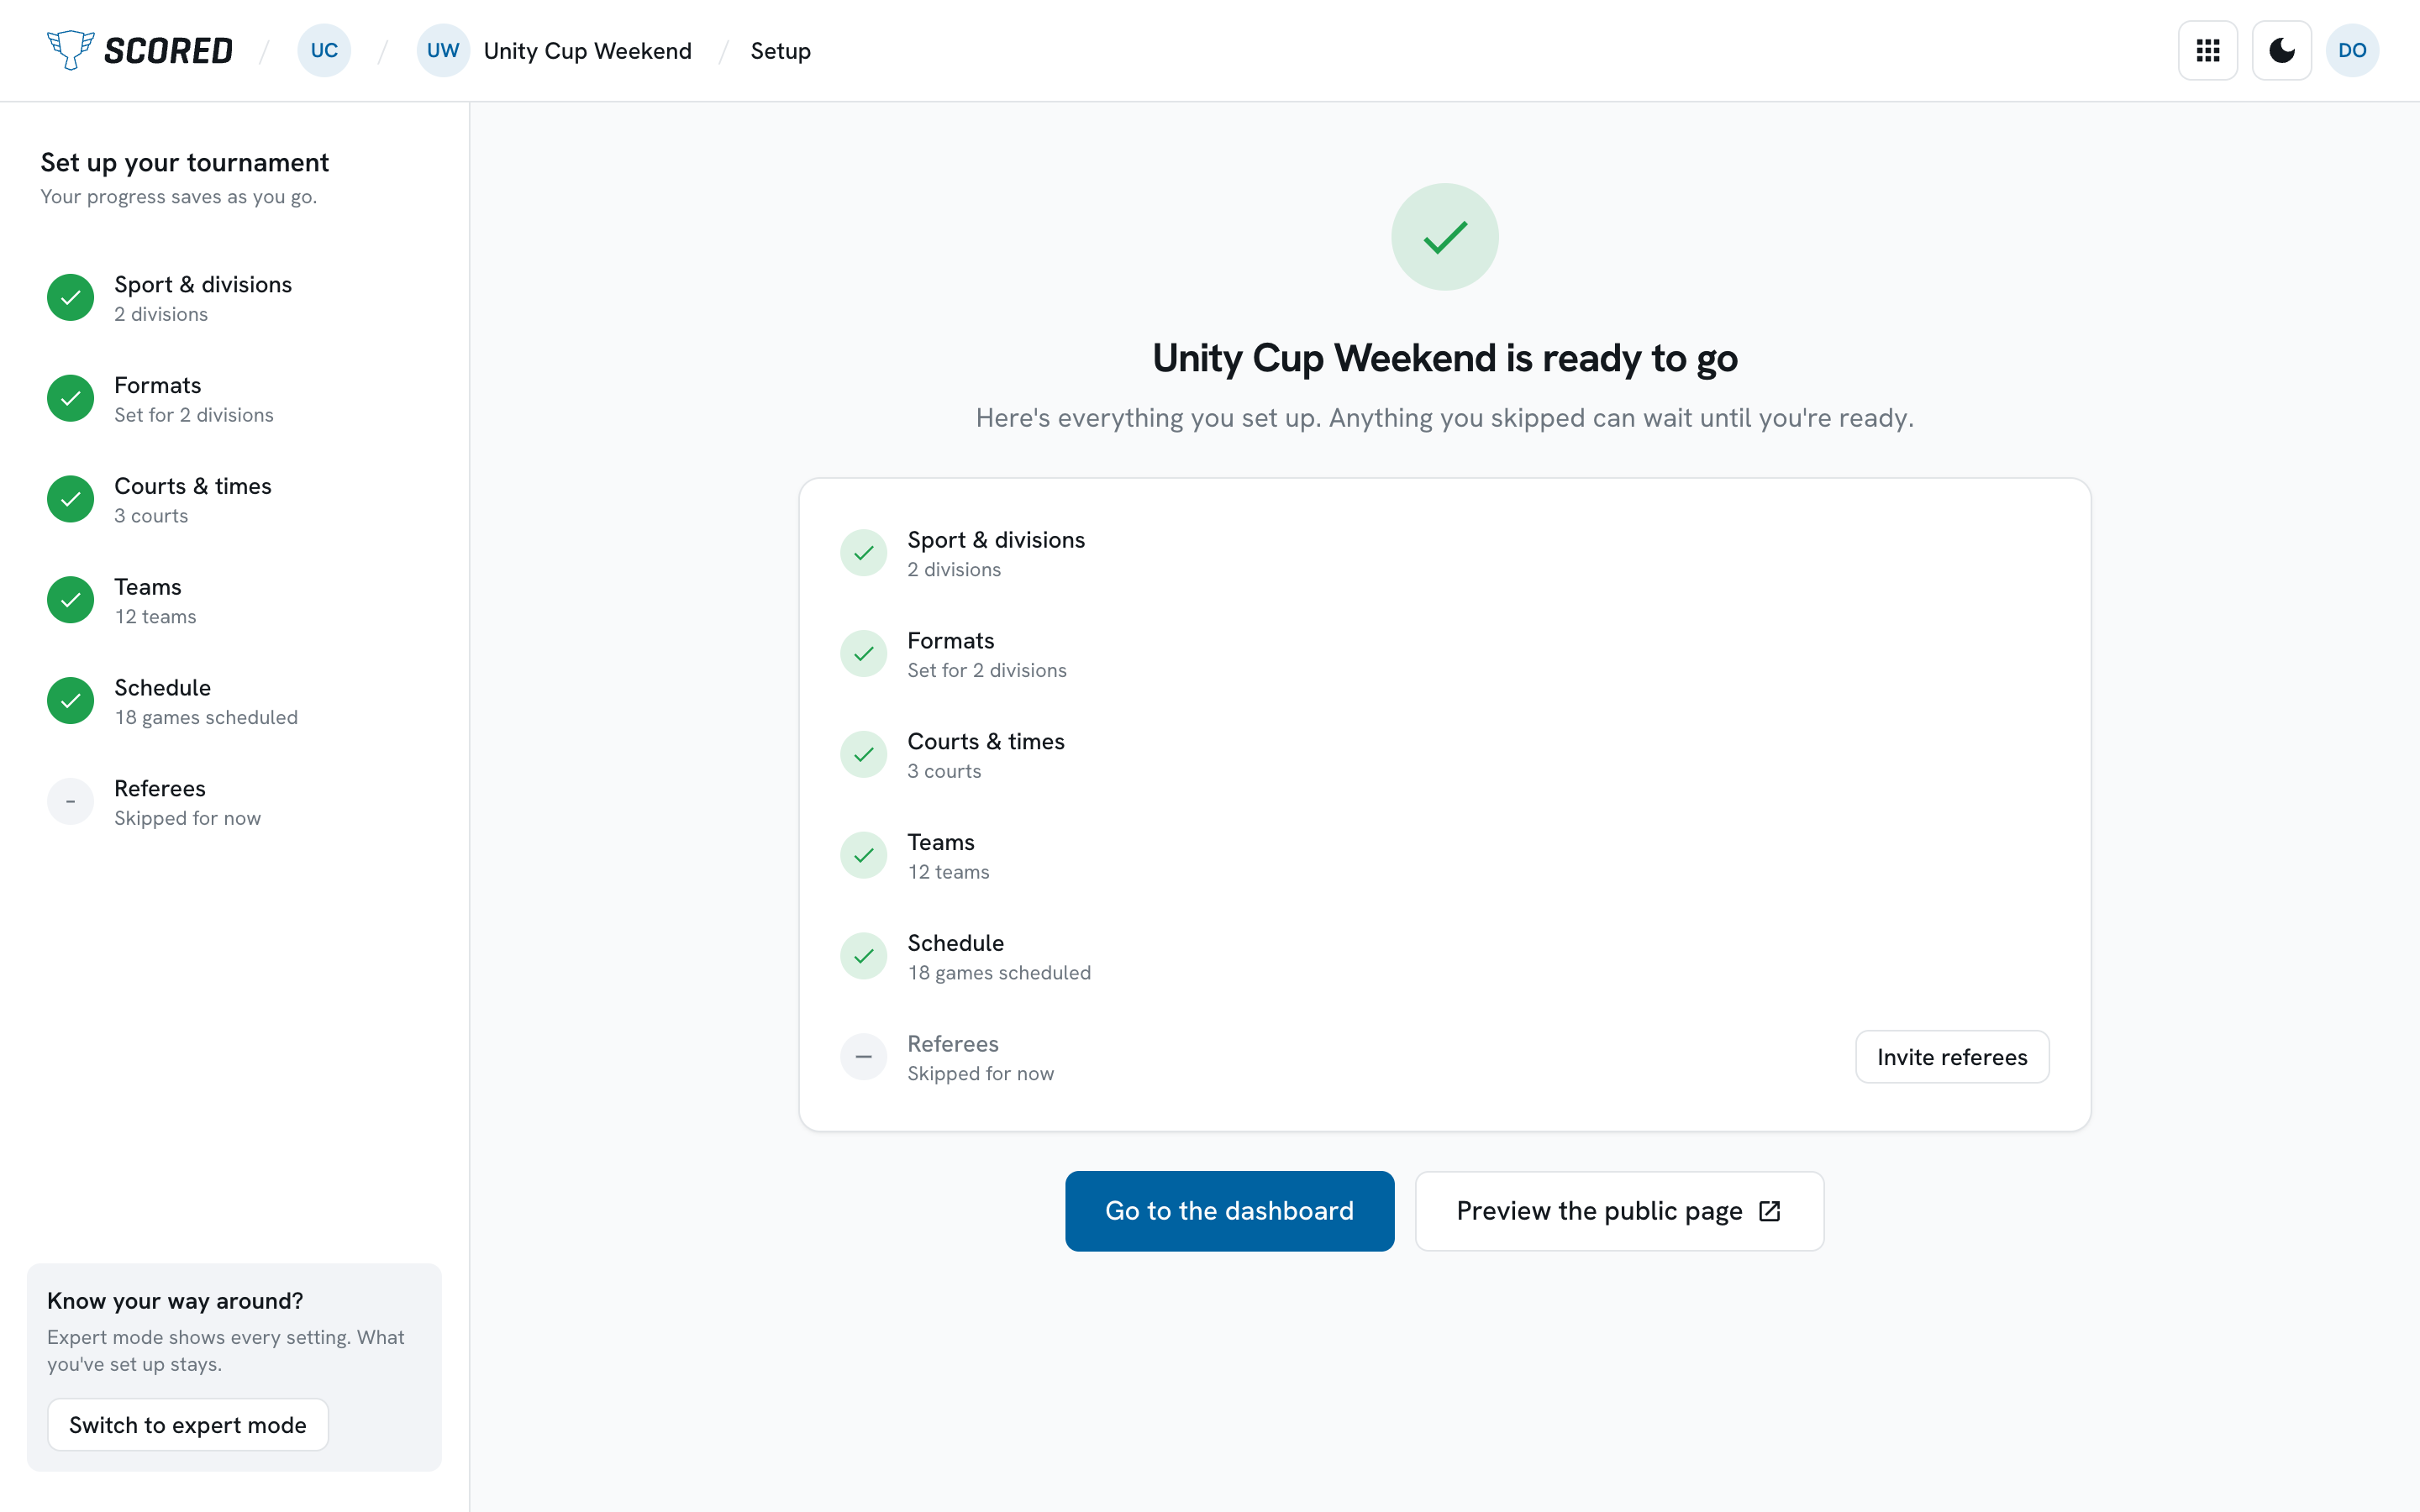
- Go to the dashboard takes you to your tournament.
- Preview the public page opens your tournament’s public page.
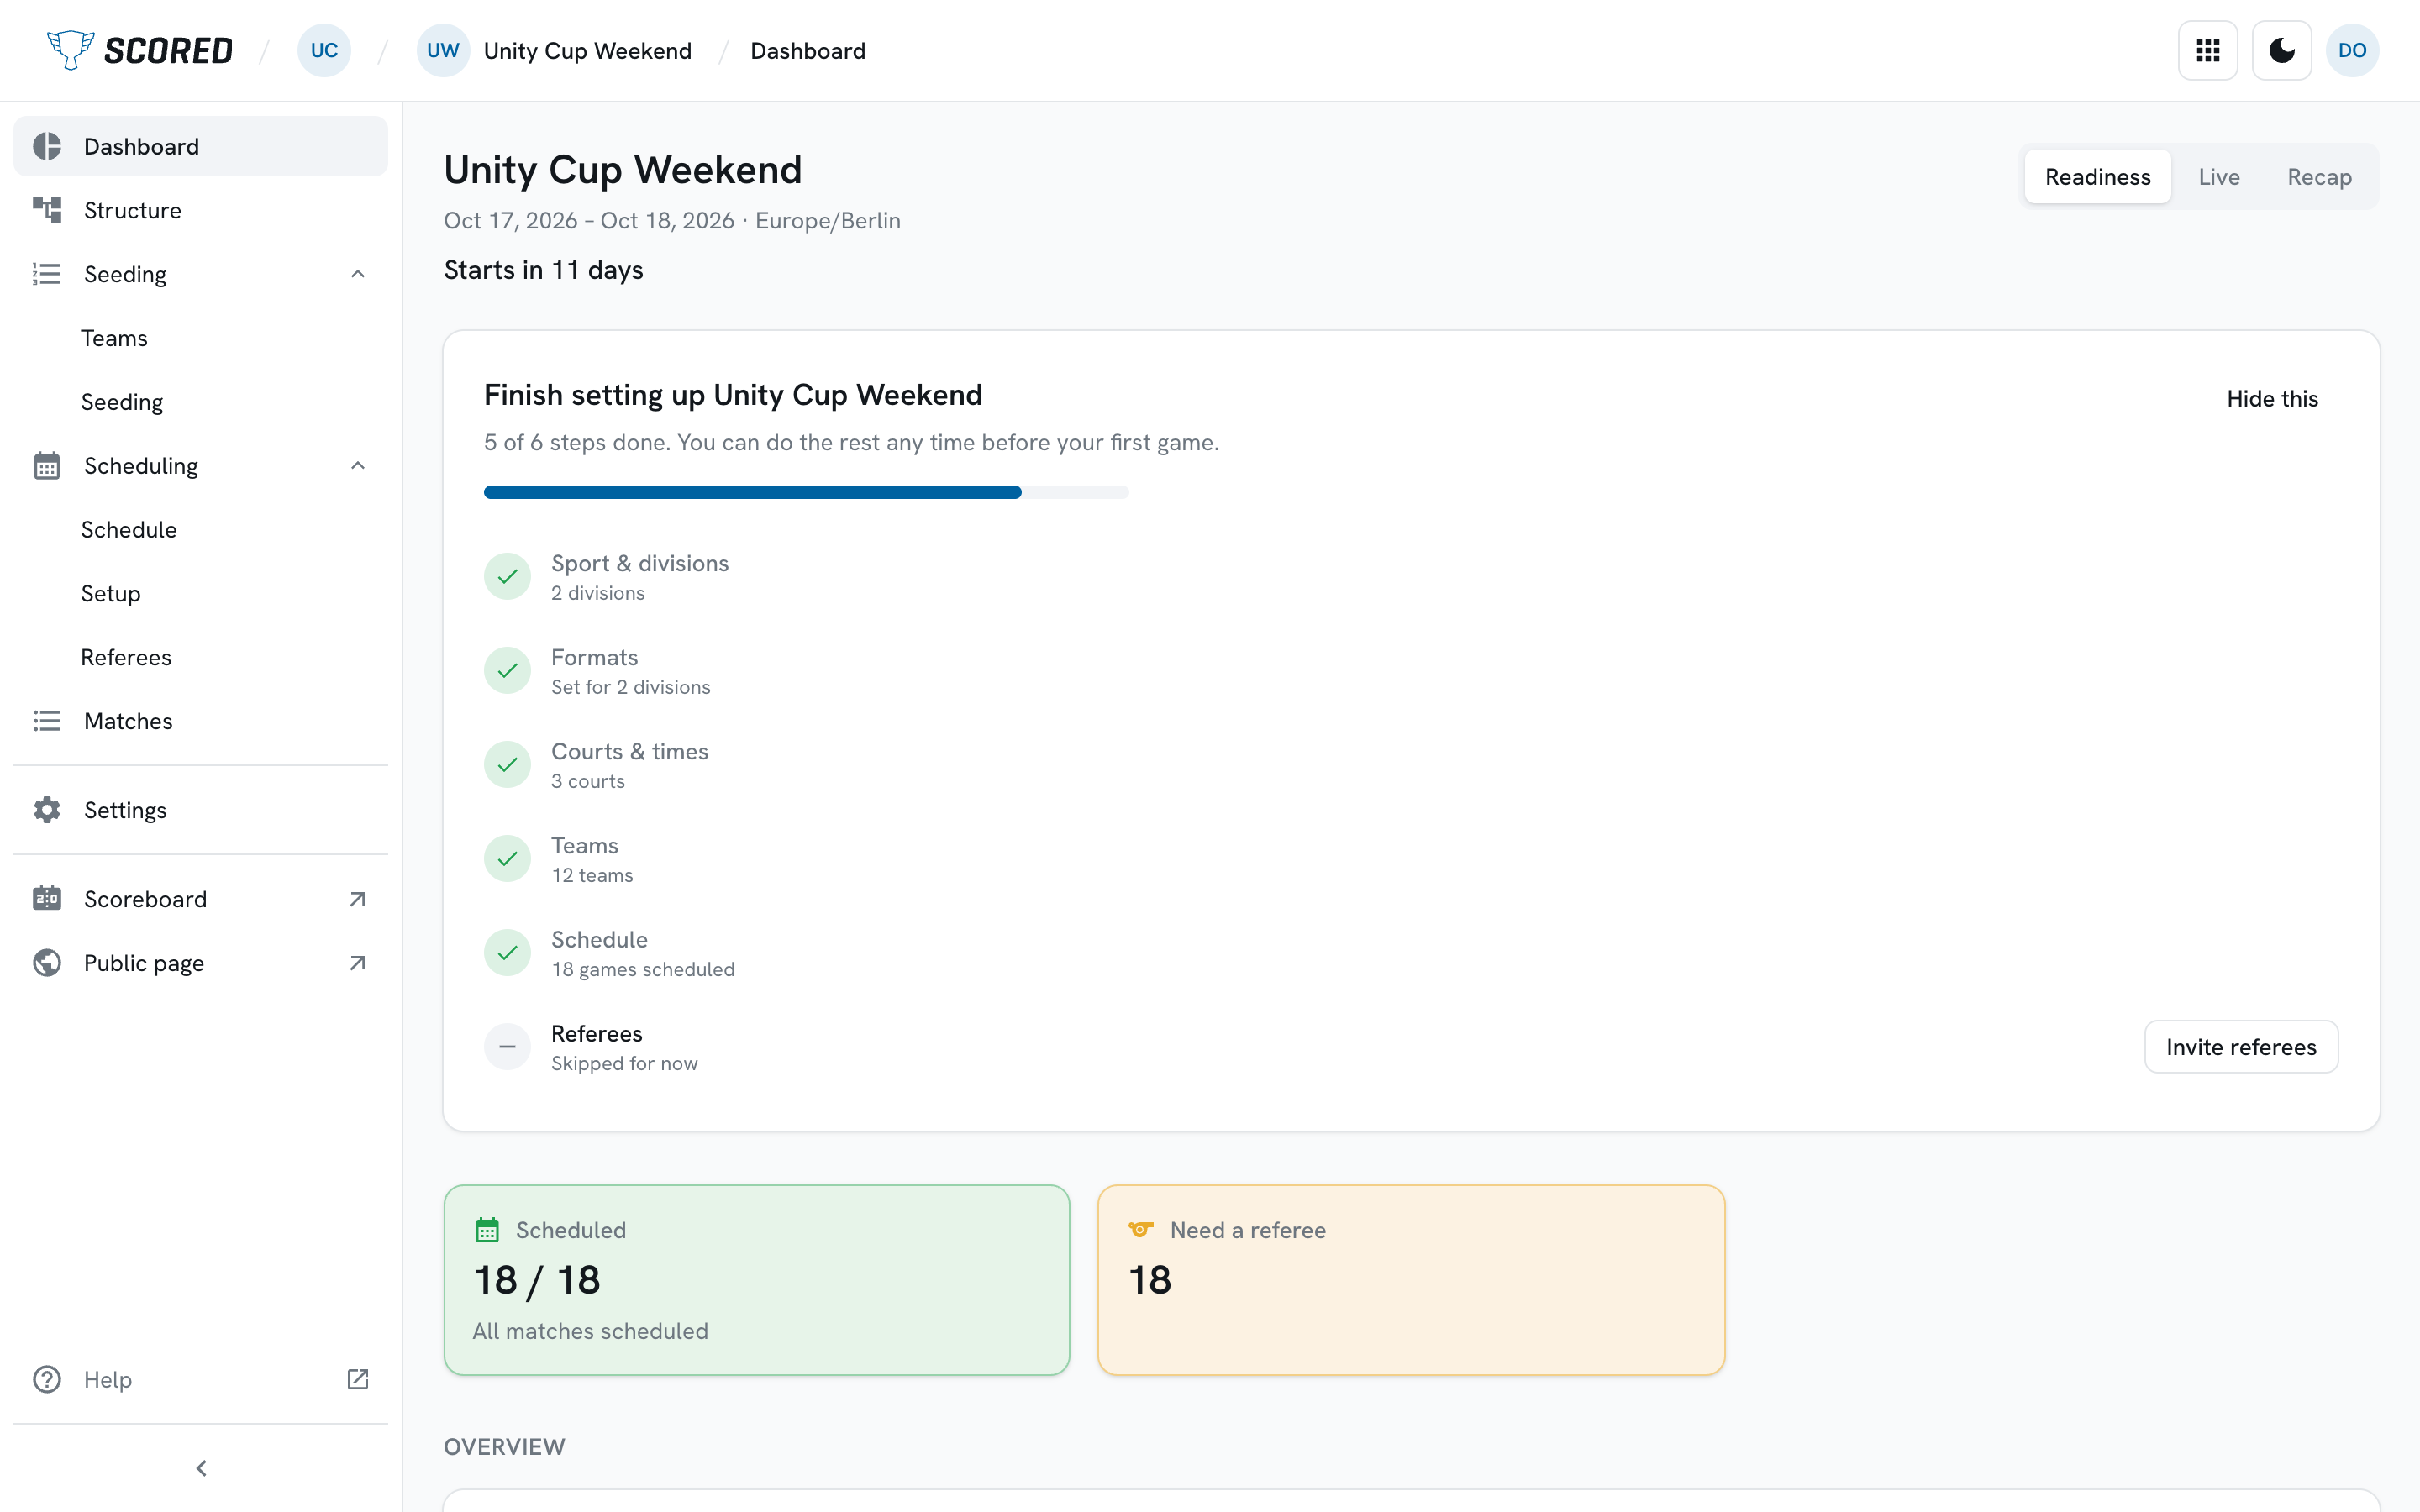
Anything you skipped can wait until you are ready. Your tournament’s dashboard shows a Finish setting up card with how many of the six steps are done and a row for each one. Click Hide this if you do not need it.
What to do next
Section titled “What to do next”-
Seed your teams.
Put each team into its group on the Seeding page. See Finding your way around.
-
Give referees their matches.
On the Small plan and up, from the Schedule page.
-
Check your public page.
Your tournament has one, on the Free plan too. Open it from Public page in the sidebar.
Easy and expert settings
Section titled “Easy and expert settings”A tournament shows its settings in one of two views:
- Easy shows the settings most tournaments need. This is where a new account starts.
- Expert “shows every setting”.
Switching only hides or shows settings. What you have set stays as it is.
Switching a tournament
Section titled “Switching a tournament”- From the setup guide: in easy mode, click Switch to expert mode below the list of steps. Scored asks first. Everything you have set up so far stays as it is, and you can tick Use expert mode for my new tournaments too.
- From settings: open Settings > General and pick Easy or Expert under Settings view.
- From the settings list: in easy mode, a line tells you how many more settings are in expert mode. Show all settings switches the tournament to expert.
Switching your account
Section titled “Switching your account”Your account decides which view your new tournaments start in.
-
Open your profile picture in the top right, then Settings.
-
Find How Scored works for you.
-
Pick Easy or Expert.
It saves straight away.
This only changes new tournaments. Tournaments you already have keep their own view.